How to disassemble the Acer TravelMate 312T

Here are some snapshot I take when disassembling my Acer TravelMate 312T to upgrade RAM and hard disk. I removed the 16 Mb expansion to add a 32 Mb module (total 48 Mb). The new hard disk is a IBM Travelstar IBM-DJSA-210, 9590MB w/384kB Cache, CHS=1299/240/63, UDMA. To let the notebook acknowledge the more RAM, I had to remove the old expansion, turn it on to acknowledge the fewer memory, turn it off, add the bigger expansion, and finally turn it on again.

For the hard disk I let the BIOS acknowledge it. It reports only 8 Gb, but as you can see from the table below, Windows and Linux use it all. Just a caveat: the PHDISK utility used to create the hybernation partition, wants to use the 4th entry of the partition table, but it is unable to address cylinders beyond 1023. So I had to accomondate other partitions around that.

chios:~# fdisk -l

Disk /dev/hda: 240 heads, 63 sectors, 1299 cylinders
Units = cylinders of 15120 * 512 bytes

   Device Boot    Start       End    Blocks   Id  System
   /dev/hda1   *         1       983   7431448+   b  Win95 FAT32
   /dev/hda2           984      1016    249480    5  Extended
   /dev/hda3          1024      1299   2086560   83  Linux
   /dev/hda4          1017      1023     52920   a0  IBM Thinkpad hibernation
   /dev/hda5           984      1000    128488+  82  Linux swap
   /dev/hda6          1001      1016    120928+  83  Linux


First of all remove all the 5 screws from the bottom of the notebook.
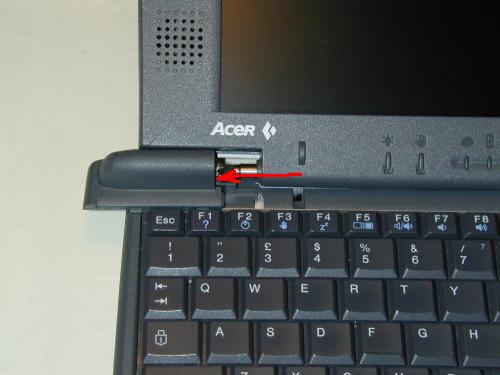
Remove the hinge covers: push with both your thumb nails toward outside. After that, you can slide up the keyboard.


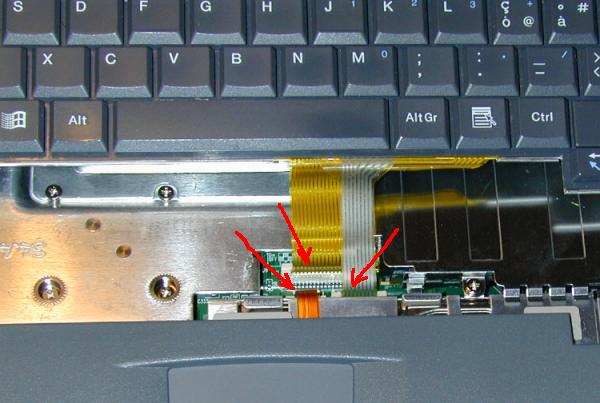
Unlock the clips that block the two flat cables of the keyboard and the small flat cable of the touchpad.


Before pulling out the flat cable, with a small skewdriver pull-up both sides of the clips.


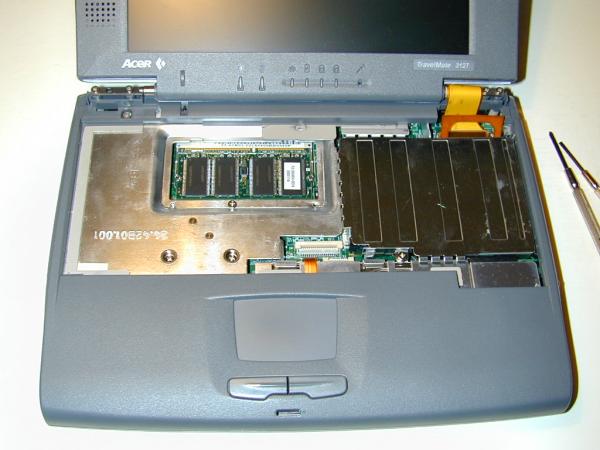
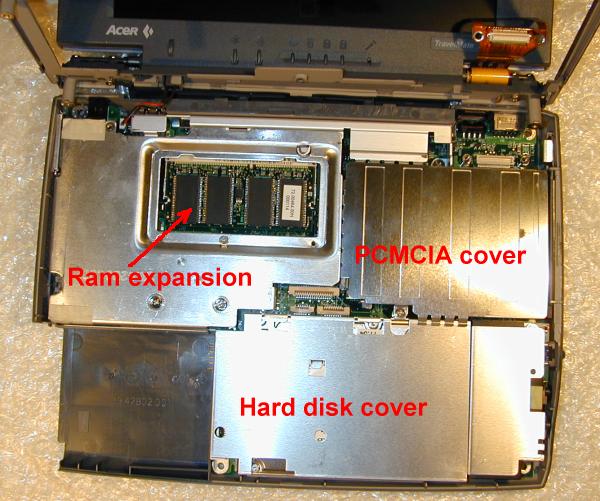
After removing the alluminium cover, you can see the RAM expansion.


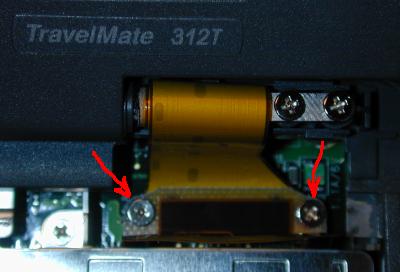
Release the video flat cable: you must unscrew the two screws shown in the photo.


After removing the screws from the top, release the top half of the chassis, beware of the two little nails in the back.


I haven't removed the top half, just raiesed it to uncover the rest of the notebook.


Remove the PCMCIA cover and the hard disk cover. 
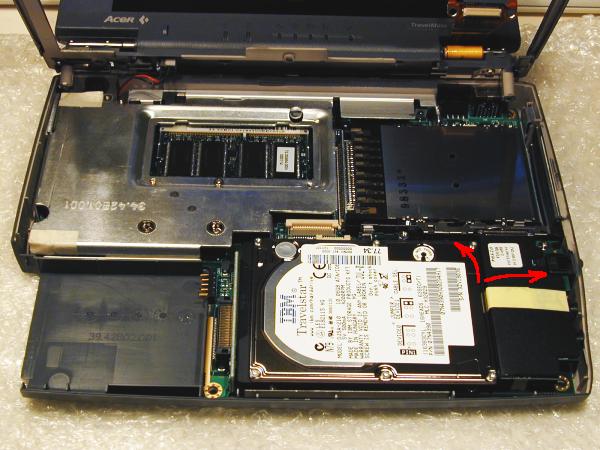
To remove the hard disk, pull-up it just as necessary, and push it to the right.


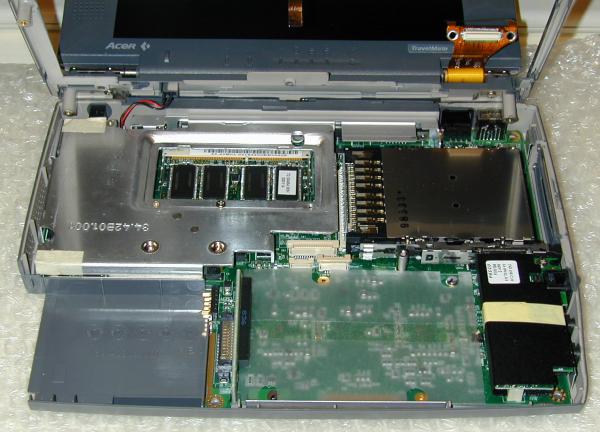
Here it is my 312T at its most disassembled status!


Page updated: Dec 15, 2001
niccolo@rigacci.org