


In this lesson, you learn about access rights. You also learn to scan a database for unread documents, read those documents, and remove a database.
Notes enables you to perform certain tasks in a database—such as editing, deleting, and copying—only if you have rights to do so. Either the creator of a database or t he database manager decides and assigns access rights to the users of the database. Some people may be allowed to create documents for the database, and others may be allowed only to read documents from the database.
The manager of a database assigns rights to various people through the access control list. The manager can assign any of seven user access levels, each of which brings with it certain privileges. The following list describes each user access le vel in an access control list:
 Forms and Views
Designing and creating forms and views is part of designing your own database, which is beyond the scope o f this book. To learn more about designing your own database, pick up Que’s Special Edition Using Lotus Notes. On the other hand, creating a database and documents is covered in Lesson 16.
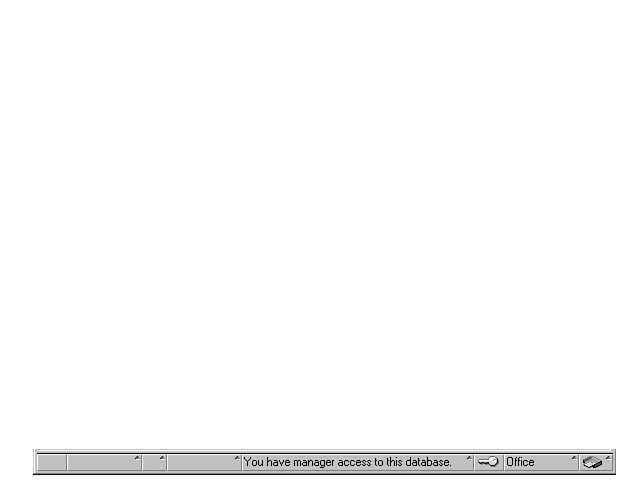
Your access rights may vary from one database to another. To find out your access rights in any database, click the Access button on the Status bar (the third button from the right). The Status bar’s message area displays your access level, as sho wn in Figure 13.1. In addition, the Groups and Roles dialog box appears, in which you can view your access level. Click Done to close the dialog box.
As you work with databases and documents, remember that you may not have the access you need to perform all procedures you want to perform.
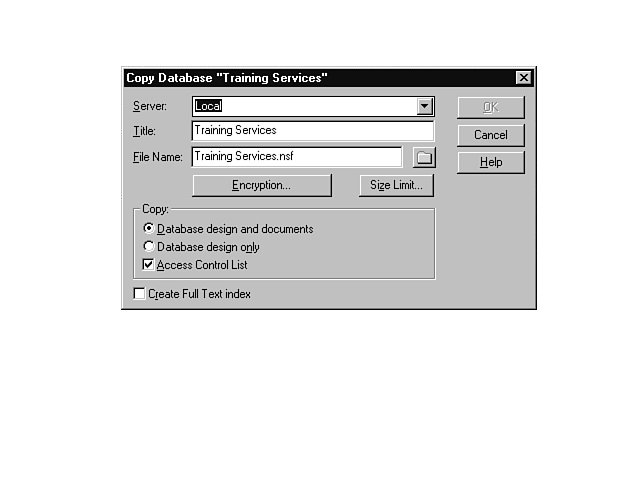
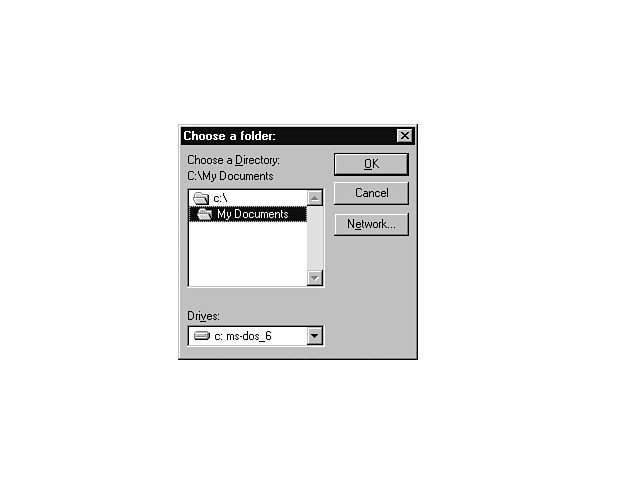
You can copy a database from your local drive to another folder or drive, or from a server to your local drive. You might want to copy a database for easier access or availability, for example. To c opy a database to another location, follow these steps:
 Move the Icon
If you want, you can move the copied database icon from one workspace page to another by clicking and dragging the icon to any page tab in your workspace.
If your company uses many databases in which documents are added and updated daily, you may want to use the Notes scan feature to locate documents you have not yet read. This saves you from having to wade through each database every day.
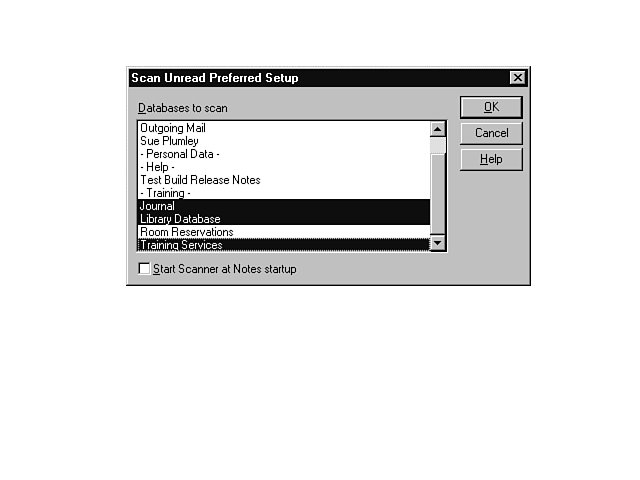
Identifying the Databases
Before you can scan databases, you must identify those databases to Notes. Make sure no databases are selected, and then follow these steps:
Scanning and Reading
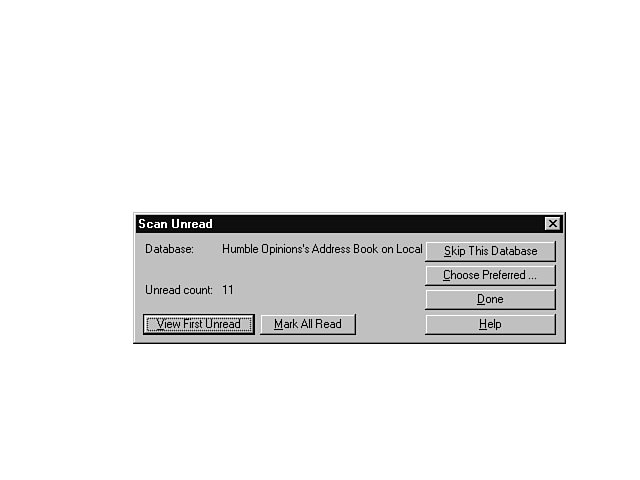
You can scan one database or multiple databases for new additions. Follow these steps to scan the database.
 SmartIcon Shortcuts
Use the Navigate Next Unread and Navigate Previous Unread SmartIcons as shortcuts for browsing through unread documents.
You can remove any database from a workspace page. To do so, right-click on the database to reveal the shortcut menu, choose Remove from Workspa ce, and choose Yes in the confirmation dialog box. Notes removes the database icon, but the database data remains on the local or network drive.
To remove a database from your local drive, open the Windows Explorer, select the database file you want to remove (look for NSF extensions), and press the Delete key. Confirm the deletion, and then close the Windows Explorer.
Using OS/2…To delete a file from your hard drive in OS/2, open the OS/2 System folder on your desktop. In the System folder, double-click the Drives icon to open the icon view of your drives. Then double-click on the drive containing the file you want to delete. By default, you see the tree view of this drive. You can double-click on any directory to view its contents. When you find the file you want to delete, right-click on its file icon and select Delete from the shortcut menu. When asked to confirm the deletion, click Yes if you’re certain that yo u really want to delete the file.
In this lesson, you learned about access control. In addition, you learned how to copy a database, scan a database for unread documents, read those documents, and remove a database from a workspace page. In the next lesson, you’ll learn how to joi n a discussion group.