


-by Kelly Murdock
It's time to put the skills you've gained in this part of the book to practical use. To conclude Part III, "Advanced 3D Graphics on the Web," you'll apply the techniques you've learned to create an interactive Web adventure. This is what you'll need to do to pull it off:
Because there's no new techniques to present, you can move pretty swiftly through this example. The real test is to actually experience the adventure, which can be found on the book's CD-ROM. Forward all-adventure awaits!
Because of its popularity, you have no doubt seen and probably played the game MYST. Robin and Rand Miller, the creators of MYST, didn't just throw together a bunch of cool-looking pictures to produce a major hit. They started with a detailed plan and story. It was the story that pulled you in and made the game so popular.
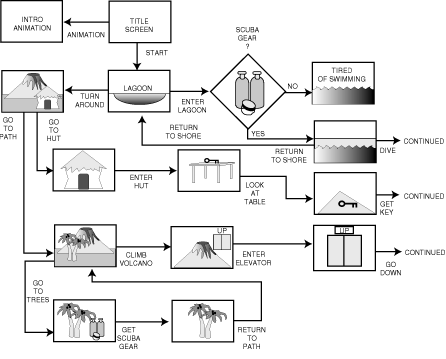
For this adventure, too, you need to start with a plan. When the plan for unfolding the adventure scene-by-scene is illustrated, it's called a storyboard, a tool often used by directors of movies and commercials. Storyboards often end up resembling complicated flowcharts.
I created the storyboard for this adventure by sketching the images, then connecting them with lines showing which images were attached to each other through links. Part of the finished storyboard is shown in Figure 12.1.
Figure 12.1: Part of the Volcano Treasure Adventure storyboard.
The buttons at the bottom of each scene are the links that move you through the adventure. By making the correct decisions, you move through the adventure until you finally enjoy the spoils of the treasure.
The Miller brothers used Strata's StudioPro for their breathtaking images. A demo of StudioPro can be found on the book's CD-ROM, but you'll use several different tools that you've worked with already in this book. You'll also get some help from other supporting products.
The bulk of the work is in setting up the scene. Because the scene would be too big to handle as only one scene, I broke the adventure down into several scenes:
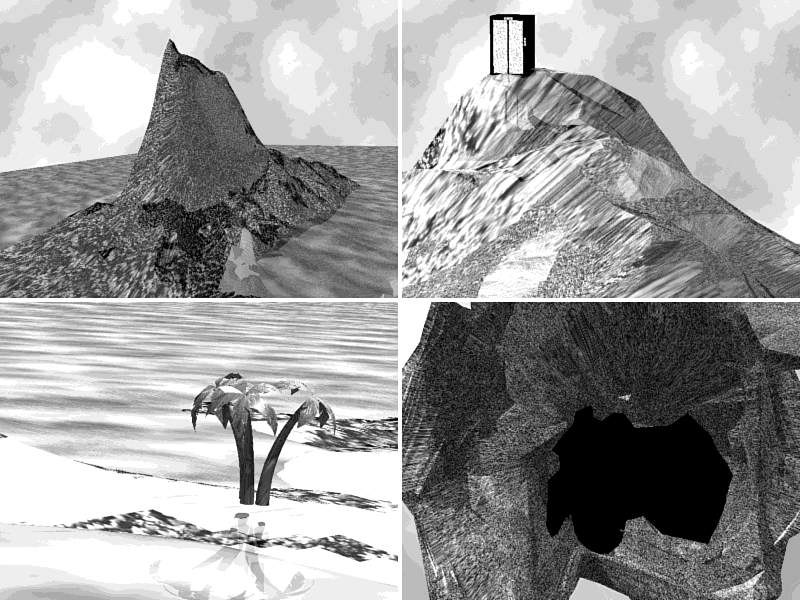
Once the scenes looked right, I started capturing the individual images by moving a camera around the scene and rendering the images to file as JPG images. A few of the images can be seen in Figure 12.2.
Figure 12.2: Rendered 3D images taken from the Volcano Treasure Adventure.
Once you have all the images, you need to build the Web pages to display them on. The Web pages should use an unobtrusive interface that doesn't detract from the adventure's look and feel. Also, you don't want to increase your file size with unnecessary elements.
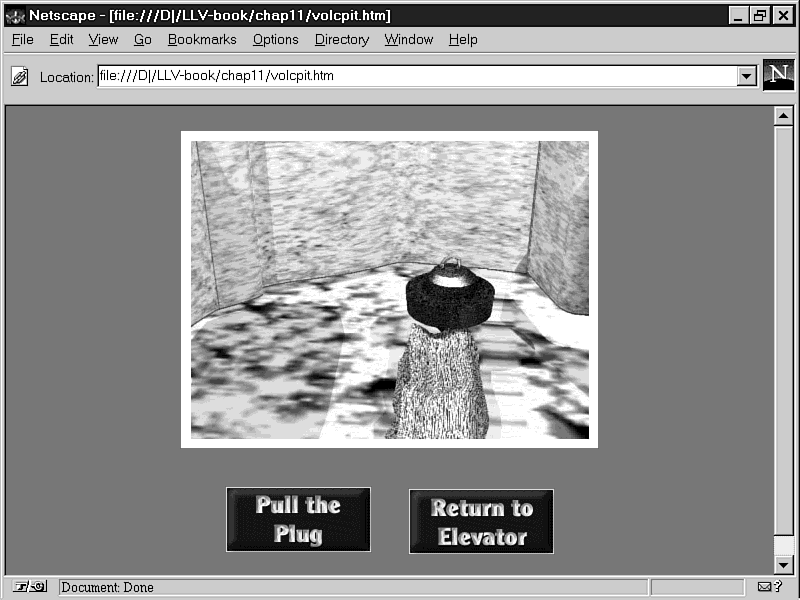
The first element to consider is the background image. Since the images are quite detailed, you don't want the background to steal any of the thunder. That's why I opted for a simple colored background, but I changed the color depending on the location in the adventure. Therefore, a light blue background is used for the undersea portion, tan for the island images, and fiery red for the volcano section, as Figure 12.3 shows.
Figure 12.3: Descending into the volcano pit during the volcano Treasure Adventure.
The next elements to consider are the user interface buttons. The navigation buttons underneath the image represent choices you can make based on the image. They are clearly marked and, coupled with the image, make it clear where each choice leads you.
The images tell the main story, but some text pages are used occasionally to fill in the gaps. The story text isn't really necessary and is added just to enhance the adventure. I designed the interface so that a text page can fit on one 800 ¥ 600 resolution screen without any scrolling required.
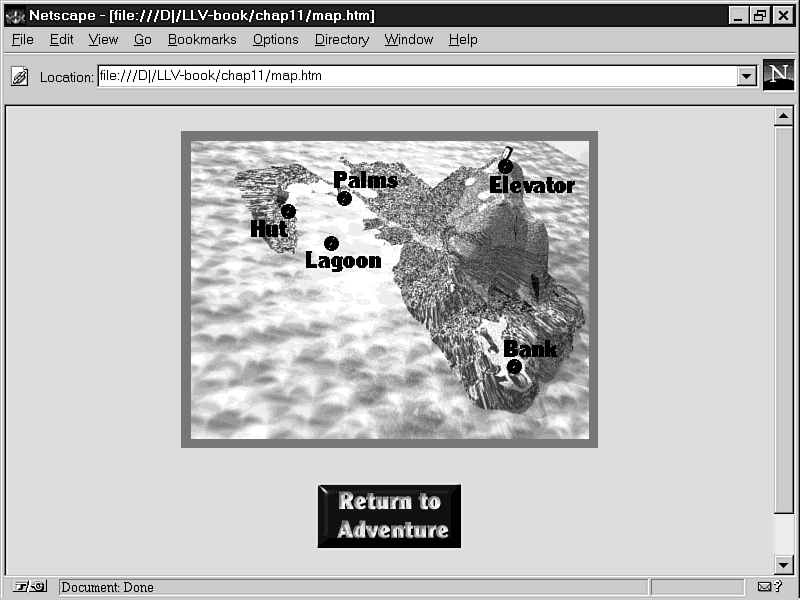
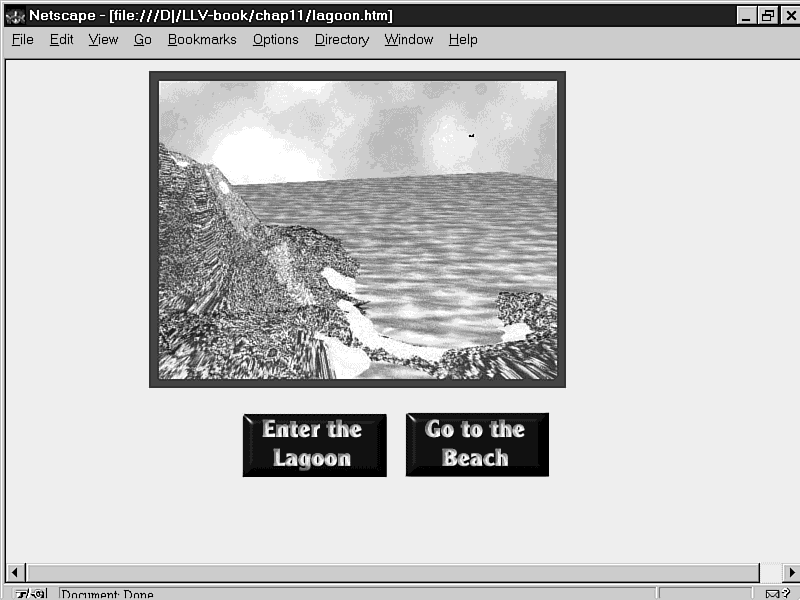
Another way to navigate through the adventure is to use image maps. Within the adventure is a scroll item you can use to hyperjump to different parts of the island. This shows another navigation method, as shown in Figure 12.4.
Figure 12.4: Use the overview image map to navigate in the adventure.
With the interface fixed, you can work on enhancing the page with additional elements, such as a title page and animations.
The tough work is done, but there are subtle ways to enhance the experience. The home page should have a unique look with a 3D title. After that, you can spice up the adventure with some 3D animations, but place the animations out of the normal Web path so that viewers who don't have the correct plug-ins won't get frustrated.
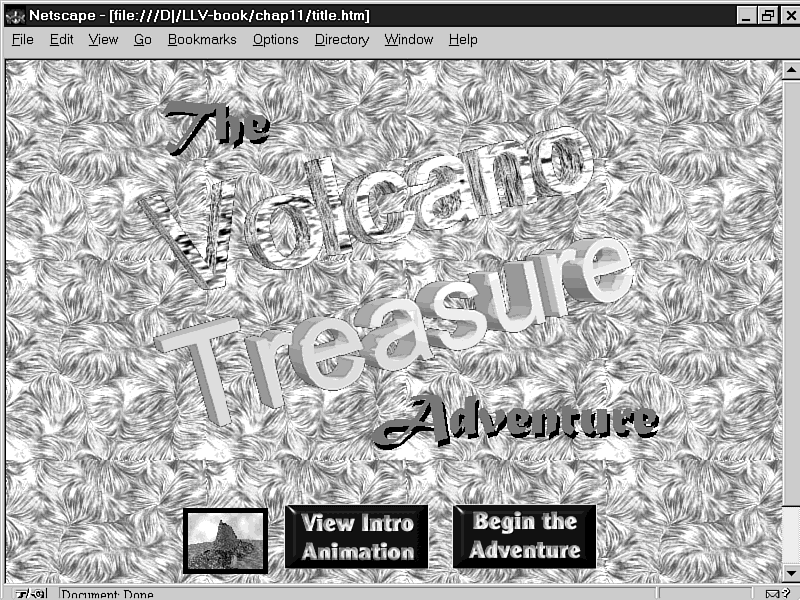
Title creation is easier than creating the images you just finished. I used some 2D tools to touch up the title page, shown in Figure 12.5. You'll notice that since this figure is reproduced in black and white, the effects used for the letters don't show up that well. For example, to see the "lava" texture map used on the word Volcano and the swirled jungle leaves on the background, check out the Adventure on the CD-ROM to see the title screen in all its glory. Notice how a thumbnail image shows a scene from the introductory animation.
Figure 12.5: Title page for the Volcano Treasure Adventure.
Animations can add a great deal to your adventure. They can give visitors a sense of how the entire island fits together. I can see two logical places where animations would help. One is at the start to introduce the adventure and convince visitors to take the time to participate. The second one is a final animation at the end of the adventure, where an animation can be a reward for finishing the adventure. Creating the animations is really quite easy once the scene is set up. All you have to do is to plan the motions.
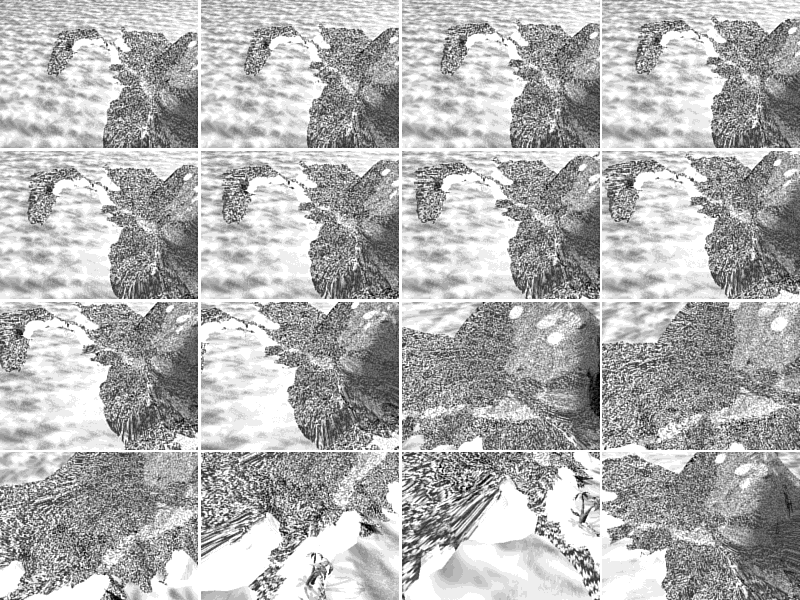
Make sure your visitors know what they're getting before they go through the download process. Thumbnails are a good peek at the animation. I used the Shockwave plug-in to handle the animation sequence because it's widely available and provides probably the best playback quality. GIF animations and streaming animations can be choppy because their playback quality is influenced by Internet traffic. Shockwave, on the other hand, downloads the entire sequence before playing the animation. Frames from the introductory animation are shown in Figure 12.6.
The concluding animation is more of a reward for having completed the adventure. It also uses the Shockwave plug-in.
Be sure to check out the adventure on the book's CD-ROM. The example in this chapter is really meant to give you a glimpse of what's possible.
On some of the pages, you'll notice a simple animation within the scene. These "sneaky" animations would take a lot of bandwidth if they were made up of different images. However, most of the images for one of these inline animations don't move, so you can get away with overlaying GIF animations. The trick is to make the unchanging portion of the image a non-tiled background and to center the animated portion, like a bird flying in the sky, on top of the background as a transparent GIF image. (See Figure 12.7.)
| Caution |
The problem with this technique is that images line up only if the screen is exactly 800 × 600. If the screen is any other size, the background becomes tiled and the GIF animations don't line up. |
This is more than the workshop wrap-up; it's also the part wrap-up. You've covered a lot of ground in these short chapters. You can use your 2D graphics packages to create interesting 3D graphics; you've learned the basic concepts of 3D rendering, modeling, and animation; and you've learned how to use this content to enliven and enhance your Web pages. I hope you take the lessons learned in this book and develop wonderful, rich games, such as MYST, for the Web.
Before you say ciao to this chapter, take a look at what's up ahead:
| What kind of machine did you use to create the images in this adventure? | |
| 3D packages usually require the fastest machines available. I used a 133 MHz Pentium with 16MB of RAM. My Matrox Millenium video card with 3D acceleration also helped.
The place I was really hurting was in my pc's memory. For large-scale scenes like this one, you really should consider 48MB or more. With prices for RAM dropping, this is becoming more reasonable. | |
| In the game MYST, you navigate around the scene by simply clicking on the image. Why didn't you just make all your images into image maps and do away with the buttons? | |
| The honest reason is that I was lazy. There are several simple programs that automate the task of creating image maps, but since this example usually had only two choices per scene, the button interface
was easier. The buttons also made it clear what the choices were without having to include a lot of text.
For more complex and detailed scenes, images maps would be a good option. I leave it to you to include them in your next adventure. |