Table of Contents
Kingelon G9000 Android phone review

I purchased this phone on eBay for 163,88 € (October 2014), with PayPal protection and fast (24/48h) courier shipping. I was very satisfied by the domestic shipping (no custom fees) and extremely fast. It was instead unpleased when I discovered that memory specifications are plain fake!
Specifications by the seller:
- CPU MT6592 8 cores at 1.7 GHz
- RAM:
 FAKE! advertised as 2 Gb, it is really 1 Gb
 - Storage: FAKE! advertised as 16 Gb, it is really 7.3 Gb
- mmcblk0 7613440 blocks (cat /proc/partitions)
- mmcblk0p5 925696 blocks (904 Mb) mounted as
/system - mmcblk0p7 2416640 blocks (2.3 Gb) mounted as
/data - mmcblk0p8 4058112 blocks, (3.9 Gb) mounted as
/storage/sdcard0
- Display: 1080 x 1920
- Operating system: Android 4.4.2
- Kernel: 3.4.67
- Build: G9000_20140815
- Battery: 3800 mAh, FAKE?
- Headset jack: 3.5 mm not compatible with standard (e.g. Samsung) headsets.
- LED: only one orange LED for charging mode. No incoming message indicator, etc.
- NFC: none.
RAM and storage: cheat and fake
The Android operating system on my Kingelon was purposely patched to report fake information about RAM and storage, there are also traces of cheating well known benchmark tools. Till now the evidences are in two files:
/system/etc/changeram.xml
<?xml version="1.0" encoding="UTF-8" standalone="no"?>
<changeram>
<item name="total" value="2000"/>
<item name="freepercent" value="85%"/>
<item name="userdata" value="10240"/>
</changeram>
/system/etc/agold_cheat_evaluating_software.xml
<?xml version='1.0' encoding='utf-8'?>
<list>
        <item name="package_name" value="pctvtv,antutu,zdevice,qihoo360,phonoalbumshoushou,benchmark,fen,smartbench,maofei,org.uguess.android.sysinfo.pro,com.dianxinos.toolbox.benchmark,com.qihoo360.mobilesafe,cn.opda.a.phonoalbumshoushou,com.ludashi.benchmark,fen.bl,com.smartbench.eleven,cn.maofei.main,zausan.zdevicetest,com.cpuid.cpu_z" />
</list>
WARNING: Do not remove that files! Someones (here and here) reported that the phone was bricked after removing the changeram.xml file. It seems that the safe procedure is to edit the files with correct values.
AnTuTu benchmark v5.1.5 is cheated by the fake RAM amount, but not in the overall scores; it reports a scores of about 22400 even after getting rid of fakes.
Disabling the fakes
After rooting the device and installing Busybox (see below), I did the following to remove the fake specifications (thanks to this post):
With the free command line tool I discovered that the RAM is actually 949880 kb, dividing it by 1024, the nearest above integer is 928 Mb, so I wrote that number as the total in changeram.xml (see below on how to remount /system in read/write mode).
<item name="total" value="928"/>
To get the actual Internal Storage, just write 0 into userdata in changeram.xml (in my case the actual value is 2360 Mb):
<item name="userdata" value="0"/>
The freepercent value seems not be used, so I left it untouched.
Finally I removed the line with item name=“package_name” from the file agold_cheat_evaluating_software.xml, this, indeed, didn't change anything in AnTuTu scores.
Get a shell on PC with Android SDK
Here it is how the phone is seen on the USB bus (using lsusb):
Bus 005 Device 010: ID 0bb4:0c03 HTC (High Tech Computer Corp.)
Enable the USB debug feature on the phone: Opzioni → Opzioni sviluppatore → Debug USB.
Download and install the Android SDK in your GNU/Linux PC, I used the $HOME/android/ directory. Then:
cd ~/android
./platform-tools/adb shell
* daemon not running. starting it now on port 5037 *
* daemon started successfully *
error: insufficient permissions for device
As you can see, I got insufficient permissions, so I need root privileges on the PC, just to start the adb server:
su
# ./platform-tools/adb kill-server
# ./platform-tools/adb start-server
* daemon not running. starting it now on port 5037 *
* daemon started successfully *
exit
./platform-tools/adb shell
shell@706v92_jbla_fhd:/ $
Missing cores in /proc/cpuinfo
One of the first thig I tried into the shell is catting /proc/cpuinfo, to see the amazing eight cores… what a shame! Only one core! I thought immediately that my phone was broken or that I was cheated by the seller:
shell@706v92_jbla_fhd:/ $ cat /proc/cp
cpu/      cpu_ss/   cpufreq/  cpuinfo
shell@706v92_jbla_fhd:/ $ cat /proc/cpuinfo
Processor       : ARMv7 Processor rev 4 (v7l)
processor       : 0
BogoMIPS        : 1154.56

Features        : swp half thumb fastmult vfp edsp thumbee neon vfpv3 tls vfpv4 idiva idivt
CPU implementer : 0x41
CPU architecture: 7
CPU variant     : 0x0
CPU part        : 0xc07
CPU revision    : 4

Hardware        : MT6592
Revision        : aaff
Serial          : 0000000000000000
No fear! It is normal to see just a few cores, because the others are almost always stopped. To see all of the 8 cores just launch some CPU hungry apps (as Antutu benchmark) and check again /prco/cpuinfo, you will see all the cores at work.
The Android System Recovery menu

To enter the System Recovery menu:
- Power-off the phone and detach any USB cable.
- Keep pressed the Volume UP button while pressing the power button.
- Release the buttons, after the Welcome logo you get the broken Android icon.
- Press the power button once, you get the menu.
WARNING! There is a bug in the Recovery, buttons does not work as stated:
- To navigate the menu use only the Volume Down button
- To select the menu item use the Volume Up button
- The power button does not work, it just hide/show the menu
This is the System Recovery menu:
- reboot system now
- apply update from ADB
- apply update from sdcard
- apply update from cache
- wipe data/factory reset
- wipe cache partition
- backup user data
- restore user data
The Factory Mode menu

To enter the Factory Mode menu:
- Power-off the phone and detach any USB cable.
- Keep pressed the volume - button while pressing the power button.
- Navigate the menu with volume +/-, select with the home button.
This is the Factory Mode menu:
- Auto Test
- Item Test
- Test Report
- Debug Test
- Clear eMMC
- Version
- Reboot
MT65xx Preloader
See this post: SP Flash Tool + MediaTek MT65xx.
Devices based on the MT65xx chip can be put in Download Mode, a state in which the flash memory can be formatted and reprogrammed. To activate this mode: turn off the device, remove the battery, and connect the USB cable to a PC (removing the battery is not strictly required). A communication interface is activated just for a few seconds (2 or so), the MT65xx device will keep the communication interface alive longer (as long as required) if it detects a data flow from the PC (Example: from SP Flash Tool).
This is the lsusb output during the time the interface is exposed:
Bus 005 Device 007: ID 0e8d:2000 MediaTek Inc..
The kernel registers the activation/deactivation of the serial interface in its log:
17982.380087] usb 5-5: new high-speed USB device number 8 using ehci-pci
[17982.513448] usb 5-5: New USB device found, idVendor=0e8d, idProduct=2000
[17982.513457] usb 5-5: New USB device strings: Mfr=1, Product=2, SerialNumber=0
[17982.513463] usb 5-5: Product: MT65xx Preloader
[17982.513468] usb 5-5: Manufacturer: MediaTek
[17982.576120] cdc_acm 5-5:1.1: ttyACM0: USB ACM device
[17985.183912] usb 5-5: USB disconnect, device number 8
MS-Windows users can install the required drivers in the little time the device appears: start the Device Manager (from Computer properties), attach the USB cable and wait until the MT65xx Preloader appears, quickly right-click on it and provide the drivers you downloaded. Once the driver are installed, the preloader device is displayed as MediaTek PreLoader USB VCOM Port.


I don't know an offical repository for the driveres, here you can find an unverified archive: MT6577 USB VCOM drivers.rar.
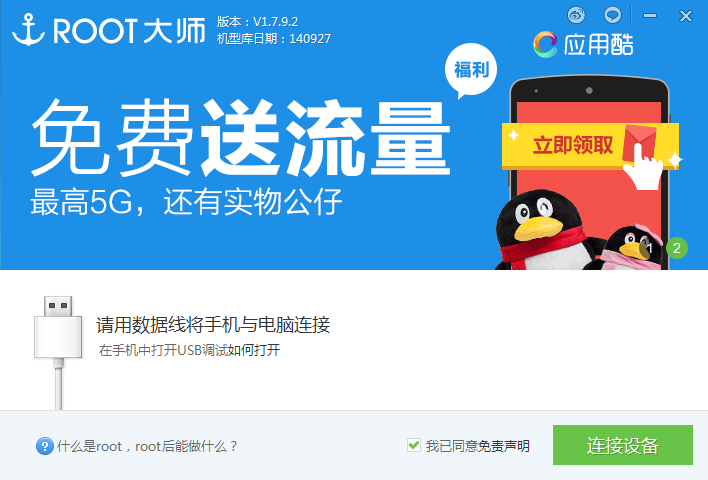
How to gain root access
We used VRoot to gain root access, which is simple and effective. The only drawback is that the procedure leave some useless apps into the phone and the superuser rights management apps is in Chinese. Other people suggest to use Kingo Android ROOT, which is otherwise suspected to stole personal data when rooting.
VRoot with PC and USB cable
I tried Framaroot and Towelroot without success. Both are Android apps which exploit some operating system or kernel bugs:
- Framaroot, tried version 1.9.3 using all the exploits contained for MTK devices (Boromir, Faramir and Barahir), but always failed with error #9. It seems that those exploits do not work with Android 4.4.2.
- https://towelroot.com/Towelroot, tried v3 but it fails (the app hangs). It exploits a bug in the Linux kernel existing till 2014-06-03, my device has system built in 2014-08-15, so it is not vulnerable.
So I tried VRoot, which is a Microsoft Windows program capable of rooting several phones using the USB cable. It seems that only recent versions are capable of rooting my device, I used 1.7.9.9730 Chinese version. The rooting went fine, the only drawback is that you will find some Chineese apps instelled on the phone, many are useless, just one is the superuser rigths management app, which is to be replaced with Superuser by ChainsDD.
The procedure, tested on Windows 7, is:
- Enable USB debugging option on the phone (Settings, Developer options, USB debugging).
- Connect the device using the USB cable, go to the Control Panel, Device Manager, you will see the MT65xx Android Phone with the yellow exclamation mark. Install the Android ADB Interface drivers. It seems that Windows is not able to find the drivers automatically, neither using Windows Update. The .inf file must contain
USB\VID_0BB4&PID_0C03&MI_01(which stands for USB device 0bb4:0c03). I don't know the offical repository, here it is an unverified one. - Detach the USB cable.
- Install VRoot 1.7.9 and run the program (just say Yes, Yes, … Next, Next, … the
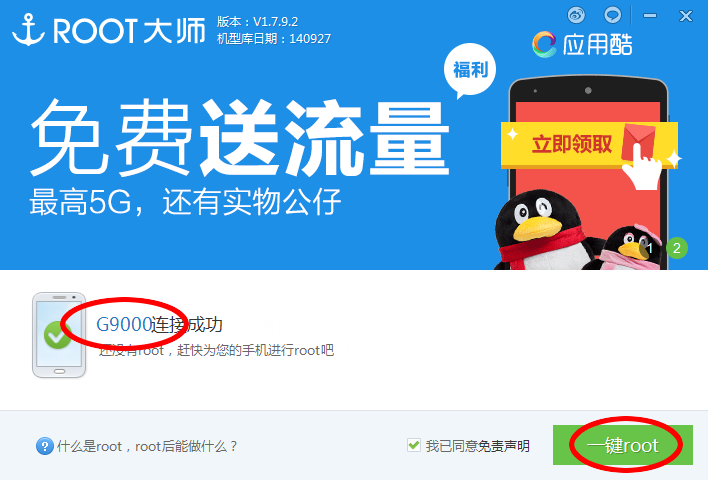
Next>button is in Chinese, but you can see the>char on it). Windows and the antivirus program suggested thath the program is a threat for the system, you have to trust the VRoot author and the download site. - Connect the USB cable and wait that VRoot detects the device. See picture 3.
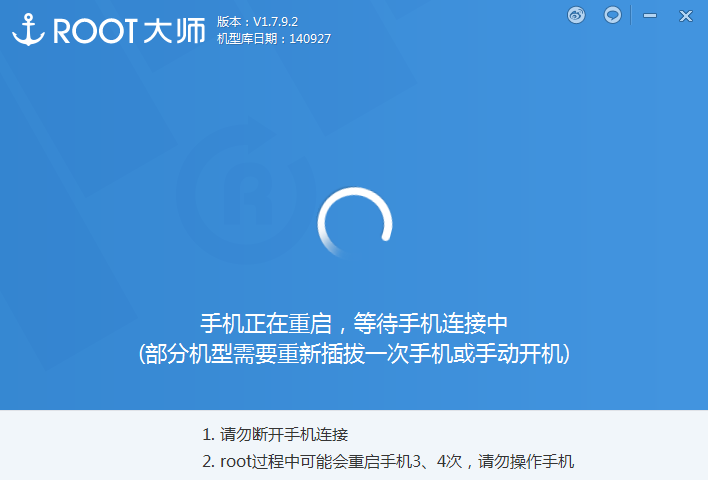
- Click the root button and wait. Something is uploaded to the phone which is then rebooted. The VRoot program does not sensed that the procedure wents fine, so it remained in an endless loop (picture 4). After several minutes I verified that the phone finished rebooting and installing, so I detached the cable and closed VRoot program on the PC.

In order to verify that root permissions are working, I installed the Terminal Emulator app by Jack Palevich. In the terminal I typed the su command (which is installed by the rooting process) and the Chinese app for superuser rigths management popped up asking for confirmation. The button on the right means Allow.


Install SuperSU and remove Chinese Apps
Afer rooting with VRoot we found three Chinese apps installed on the phone, one is used to manage superuser permissions, but we want to install SuperSU by Chainfire instead (we tried also Superuser by ChainsDD, but it was unable to automatically replace the Chinese counterpart). This is the procedure:
- Uninstall any Superuser or SuperSU apps previously installed.
- Install SuperSU from the Google Play. In the Chinese pop-up respond with Allow to every requests (the Chinese label is:
允许). - Execute a superuser action (e.g. launch
sufrom the terminal emulator), in the following pop-ups allow SuperSU to make the changes it wants (replace the su binary, etc.). - Reboot the device and check if SuperSU is used whenever a superuser action is invoked.
To remove the crapware installed by VRoot look into the /data/app/ and /system/app/ directories (look at the timestamps to understand when they were downloaded). We found the following packages:
- /data/app/com.mgyapp.android-1.apk (应用酷 in Chinese)
- /data/app/com.example.cameraroot-1.apk
- /data/app/com.supercleaner-1.apk (安卓清理大师 in Chinese)
- /system/app/Superuser.apk (授权管理 in Chinese)
For the user applications, just open the app manager and uninstall them. For the system ones it is possibile tu use some uninstaller like App Master, which obviously requires root privileges. That application (at least v. 5.4.0) does not clean every trace of the app, it does not remove the /data/data/<package>/ directory and the package section into /data/system/packages.xml file, so a manual method is better.
This is the manual procedure to remove a system app:
- Remount the
/systemfilesystem in read/write mode - Remove the file
/system/app/<package>.apk - Remove the data associated to the app from
/data/data/ - Remove any app reference from the file
/data/system/packages.xml
In shell commands:
mount -o remount,rw /system
rm /system/app/Superuser.apk
rm -r /data/data/com.mgyun.superuser
vi /data/system/packages.xml
mount -o remount,ro /system
Another system app, which comes with the stock ROM, is the Google Pinyin Input Method (PinyinIME.apk), the Chinese name is 谷歌拼音输入法. This is an input method (keyboard) for Chinese language. Remove it if you don't want to write Chinese.
2 Gb of fake RAM (really 1 Gb)
The device is advertised as containing 2 Gb of RAM, but this is a plain fake!
Many banchmarks (e.g. AnTuTu) and hardware checking programs (e.g. CPU-Z) are cheated, also /proc/meminfo in the terminal:
shell@706v92_jbla_fhd:/data $ cat /proc/meminfo
MemTotal:        2048000 kB
MemFree:          983846 kB
...
But something suspicious is cotained in the file /system/etc/changeram.xml:
<?xml version="1.0" encoding="UTF-8" standalone="no"?>
<changeram>
<item name="total" value="2000"/>
<item name="freepercent" value="85%"/>
<item name="userdata" value="10240"/>
</changeram>
Afer you have rooted the phone and installed the busybox app by Stephen Stericson, you can check the real free memory with the free command:
shell@706v92_jbla_fhd:/data $ free
             total         used         free       shared      buffers
Mem:        949880       902176        47704            0         6868
-/+ buffers:             895308        54572
Swap:       524284       260260       264024
16 Gb of fake storage (really 7.3 Gb)
This is the actual storage layout of the Kingelon G9000 (see Android memory):
- 904 Mb of
/system(ROM) - 2.30 Gb of
/data(Internal Storage) - 3.87 Gb of
/storage/sdcard0(Phone Storage)
The device is advertised as per 16 Gb of storage space, but even without root permission you can see that something is different (in the terminal):
shell@706v92_jbla_fhd:/data $ cat /proc/partitions
major minor  #blocks  name

   7        0       1254 loop0
 253        0     524288 zram0
 179        0    7613440 mmcblk0
 179        1          1 mmcblk0p1
 179        2      10240 mmcblk0p2
 179        3      10240 mmcblk0p3
 179        4       6144 mmcblk0p4
 179        5     925696 mmcblk0p5
 179        6     131072 mmcblk0p6
 179        7    2416640 mmcblk0p7
 179        8    4058112 mmcblk0p8
 179       64       4096 mmcblk0boot1
 179       32       4096 mmcblk0boot0
With root permission you can see the truth:
root@706v92_jbla_fhd:/ # blockdev --getsize64 /dev/block/mmcblk0
7796162560
root@706v92_jbla_fhd:/data # df
Filesystem               Size     Used     Free   Blksize
/dev                   463.8M   280.0K   463.5M   4096
/sys/fs/cgroup         463.8M    12.0K   463.8M   4096
/mnt/secure            463.8M     0.0K   463.8M   4096
/mnt/asec              463.8M     0.0K   463.8M   4096
/mnt/obb               463.8M     0.0K   463.8M   4096
/system                888.8M   700.4M   188.4M   4096
/data                    2.3G   502.0M     1.8G   4096
/cache                 126.0M     4.1M   121.9M   4096
/protect_f               8.8M     4.1M     4.8M   4096
/protect_s               8.8M     4.0M     4.8M   4096
/mnt/cd-rom              1.2M     1.2M     0.0K   2048
/mnt/media_rw/sdcard0     3.9G     1.7G     2.2G   32768
/mnt/secure/asec         3.9G     1.7G     2.2G   32768
/storage/sdcard0         3.9G     1.7G     2.2G   32768
The three partitions of 3.9 Gb are really the same device, just check the mounted devices:
/emmc@android           /system                ext4
/emmc@usrdata           /data                  ext4
/emmc@cache             /cache                 ext4
/emmc@protect_f         /protect_f             ext4
/emmc@protect_s         /protect_s             ext4
/dev/block/loop0        /mnt/cd-rom            iso9660
/dev/block/vold/179:8   /mnt/media_rw/sdcard0  vfat
/dev/block/vold/179:8   /mnt/secure/asec       vfat
/dev/fuse               /storage/sdcard0       fuse
The storage is based on EMMC (Embedded MultiMedia Card):
cat /proc/emmc
partno:    start_sect   nr_sects  partition_name
emmc_p1: 00000400 00000002 "ebr1"
emmc_p2: 00004800 00005000 "protect_f"
emmc_p3: 00009800 00005000 "protect_s"
emmc_p4: 00018d00 00003000 "sec_ro"
emmc_p5: 00028000 001c4000 "android"
emmc_p6: 001ec000 00040000 "cache"
emmc_p7: 0022c000 0049c000 "usrdata"
emmc_p8: 006c8000 007bd800 "fat"
root@706v92_jbla_fhd:/ # ls -l /dev/block/mmcblk0*
brw-rw---- root     system   179,   0 2014-10-20 18:10 mmcblk0
brw-rw---- root     system   179,  32 2014-10-20 18:10 mmcblk0boot0
brw------- root     root     179,  64 2014-10-20 18:10 mmcblk0boot1
brw------- root     root     179,   1 2014-10-20 18:10 mmcblk0p1
brw------- root     root     179,   2 2014-10-20 18:10 mmcblk0p2
brw------- root     root     179,   3 2014-10-20 18:10 mmcblk0p3
brw------- root     root     179,   4 2014-10-20 18:10 mmcblk0p4
brw------- root     root     179,   5 2014-10-20 18:10 mmcblk0p5
brw------- root     root     179,   6 2014-10-20 18:10 mmcblk0p6
brw------- root     root     179,   7 2014-10-20 18:10 mmcblk0p7
brw------- root     root     179,   8 2014-10-20 18:10 mmcblk0p8
Fastboot mode problems
The phone enters the fastboot mode using the adb command from the attached PC (requires root on the PC):
./platform-tools/adb reboot-bootloader
I tried the bootloader unlock command:
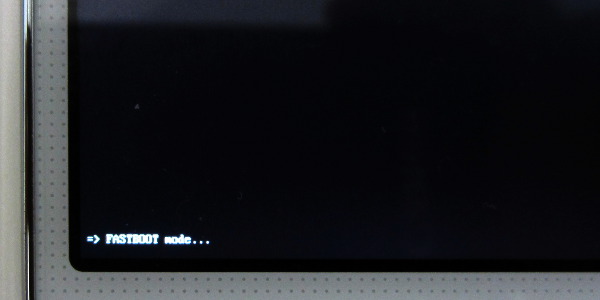
./platform-tools/fastboot oem unlock
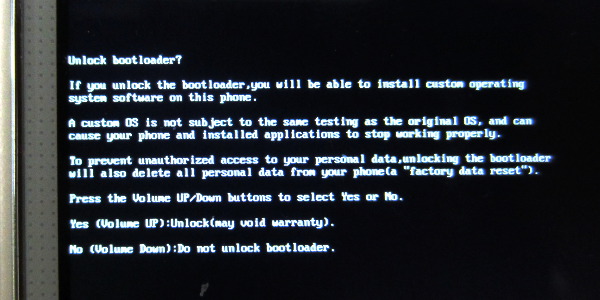
The phone warns about unlocking risks and deleting all the user data (screenshot #2), but it seems that there is a problem with the key mapping, because the only working key is volume UP, which does not confirm the unlock operation, but it just returns into a not working boot menu (screenshot #3).
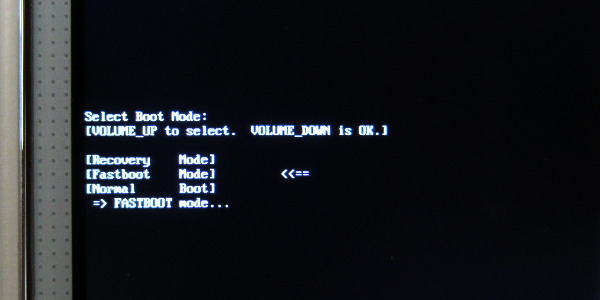
I had to issue the reboot command from PC fastboot.
Problem with adb backup
I tried to backup data using adb tool via the USB cable, but it fails if all the objects are included: the command never returns and the confirmation dialog on the phone does not dismiss as expected. I had to execute two separated backups:
./platform-tools/adb backup -f g9000_2014-10-26_apk-obb-all-system.ab -apk -obb -all -system
./platform-tools/adb backup -f g9000_2014-10-26_shared.ab -shared
Battery
The battery is labeled as 3800 mAh, an incredible high value! Is it real?
Charging time
Phone turned off, full discharged: 2 hours to reach 75% of charge. Using a Samsung travel adapter (5V, 0.7A).
Camera


The back camera takes pictures at about 13 Mpixels (4160 x 3120). While colors are quite satisfying, the quality is poor indeed. With default settings in good light conditions, the noise in midrange shadows is rather visible, compression artifacts are also annoying. It seems also that some sort of sharpening filter is applied automatically: zoom at 1:1 or more to see the exagerated contrast of fine details.
Headset connector
The provided headset has a 3.5 mm jack with 4 poles (TRRS), but is has a non-standard length. I tried some other headsets, but they are not recognized: no “headset” icon in the status bar. Using a third party headset the FM radio application does not work, because it requires an headset plugged.
The pinout seems to be iPhone-like: left, right, ground and mic (Tip, Ring, Ring, Sleeve), so I wired an adapter cable “4 to 3 poles” to get the audio into my car, but only the left channel is working. To change the audio routing I used the SoundAbout app by David Woods.
Someone reported that extending the length of the jack can solve the problem; it requires a small lathe to modify the jack.
Networking
This is the state with data connection enabled, WiFi disabled:
root@706v92_jbla_fhd:/ # ip addr show
1: lo: <LOOPBACK,UP,LOWER_UP> mtu 16436 qdisc noqueue state UNKNOWN
    link/loopback 00:00:00:00:00:00 brd 00:00:00:00:00:00
    inet 127.0.0.1/8 scope host lo
    inet6 ::1/128 scope host
       valid_lft forever preferred_lft forever
2: ifb0: <BROADCAST,NOARP> mtu 1500 qdisc noop state DOWN qlen 32
    link/ether 46:2a:bc:c3:79:5b brd ff:ff:ff:ff:ff:ff
3: ifb1: <BROADCAST,NOARP> mtu 1500 qdisc noop state DOWN qlen 32
    link/ether b6:bb:e4:c9:8d:54 brd ff:ff:ff:ff:ff:ff
4: tunl0: <NOARP> mtu 1480 qdisc noop state DOWN
    link/ipip 0.0.0.0 brd 0.0.0.0
5: sit0: <NOARP> mtu 1480 qdisc noop state DOWN
    link/sit 0.0.0.0 brd 0.0.0.0
6: ip6tnl0: <NOARP> mtu 1452 qdisc noop state DOWN
    link/tunnel6 :: brd ::
7: ccmni0: <NOARP,UP,LOWER_UP> mtu 1500 qdisc pfifo_fast state UNKNOWN qlen 1000
    link/ether 5a:6d:81:13:4a:27 brd ff:ff:ff:ff:ff:ff
    inet 10.200.148.163/8 scope global ccmni0
8: ccmni1: <NOARP> mtu 1500 qdisc noop state DOWN qlen 1000
    link/ether 2a:9a:3b:cc:26:60 brd ff:ff:ff:ff:ff:ff
9: ccmni2: <NOARP> mtu 1500 qdisc noop state DOWN qlen 1000
    link/ether ba:59:39:c0:bd:e1 brd ff:ff:ff:ff:ff:ff
root@706v92_jbla_fhd:/ # ip route show
default via 10.200.148.163 dev ccmni0  scope link
10.200.148.163 dev ccmni0  scope link
Charging problem: disassembling the G9000
After three months of use, the phone started suffering from charging problem.
Sometimes the orange LED did not light-up when the power adapter was plugged; sometimes a crazy loop of messages charger plugged - charger unplugged begun, which can result in phone crash. Sometimes, when the phone was plugged for the nightly charge, the orange LED turned on, but the morning after the phone was completely discharged ad the LED was off. Sometimes applying a light force to the USB connector (blending it toward the back of the phone) seemed to help, but everything was extremly unreliable.
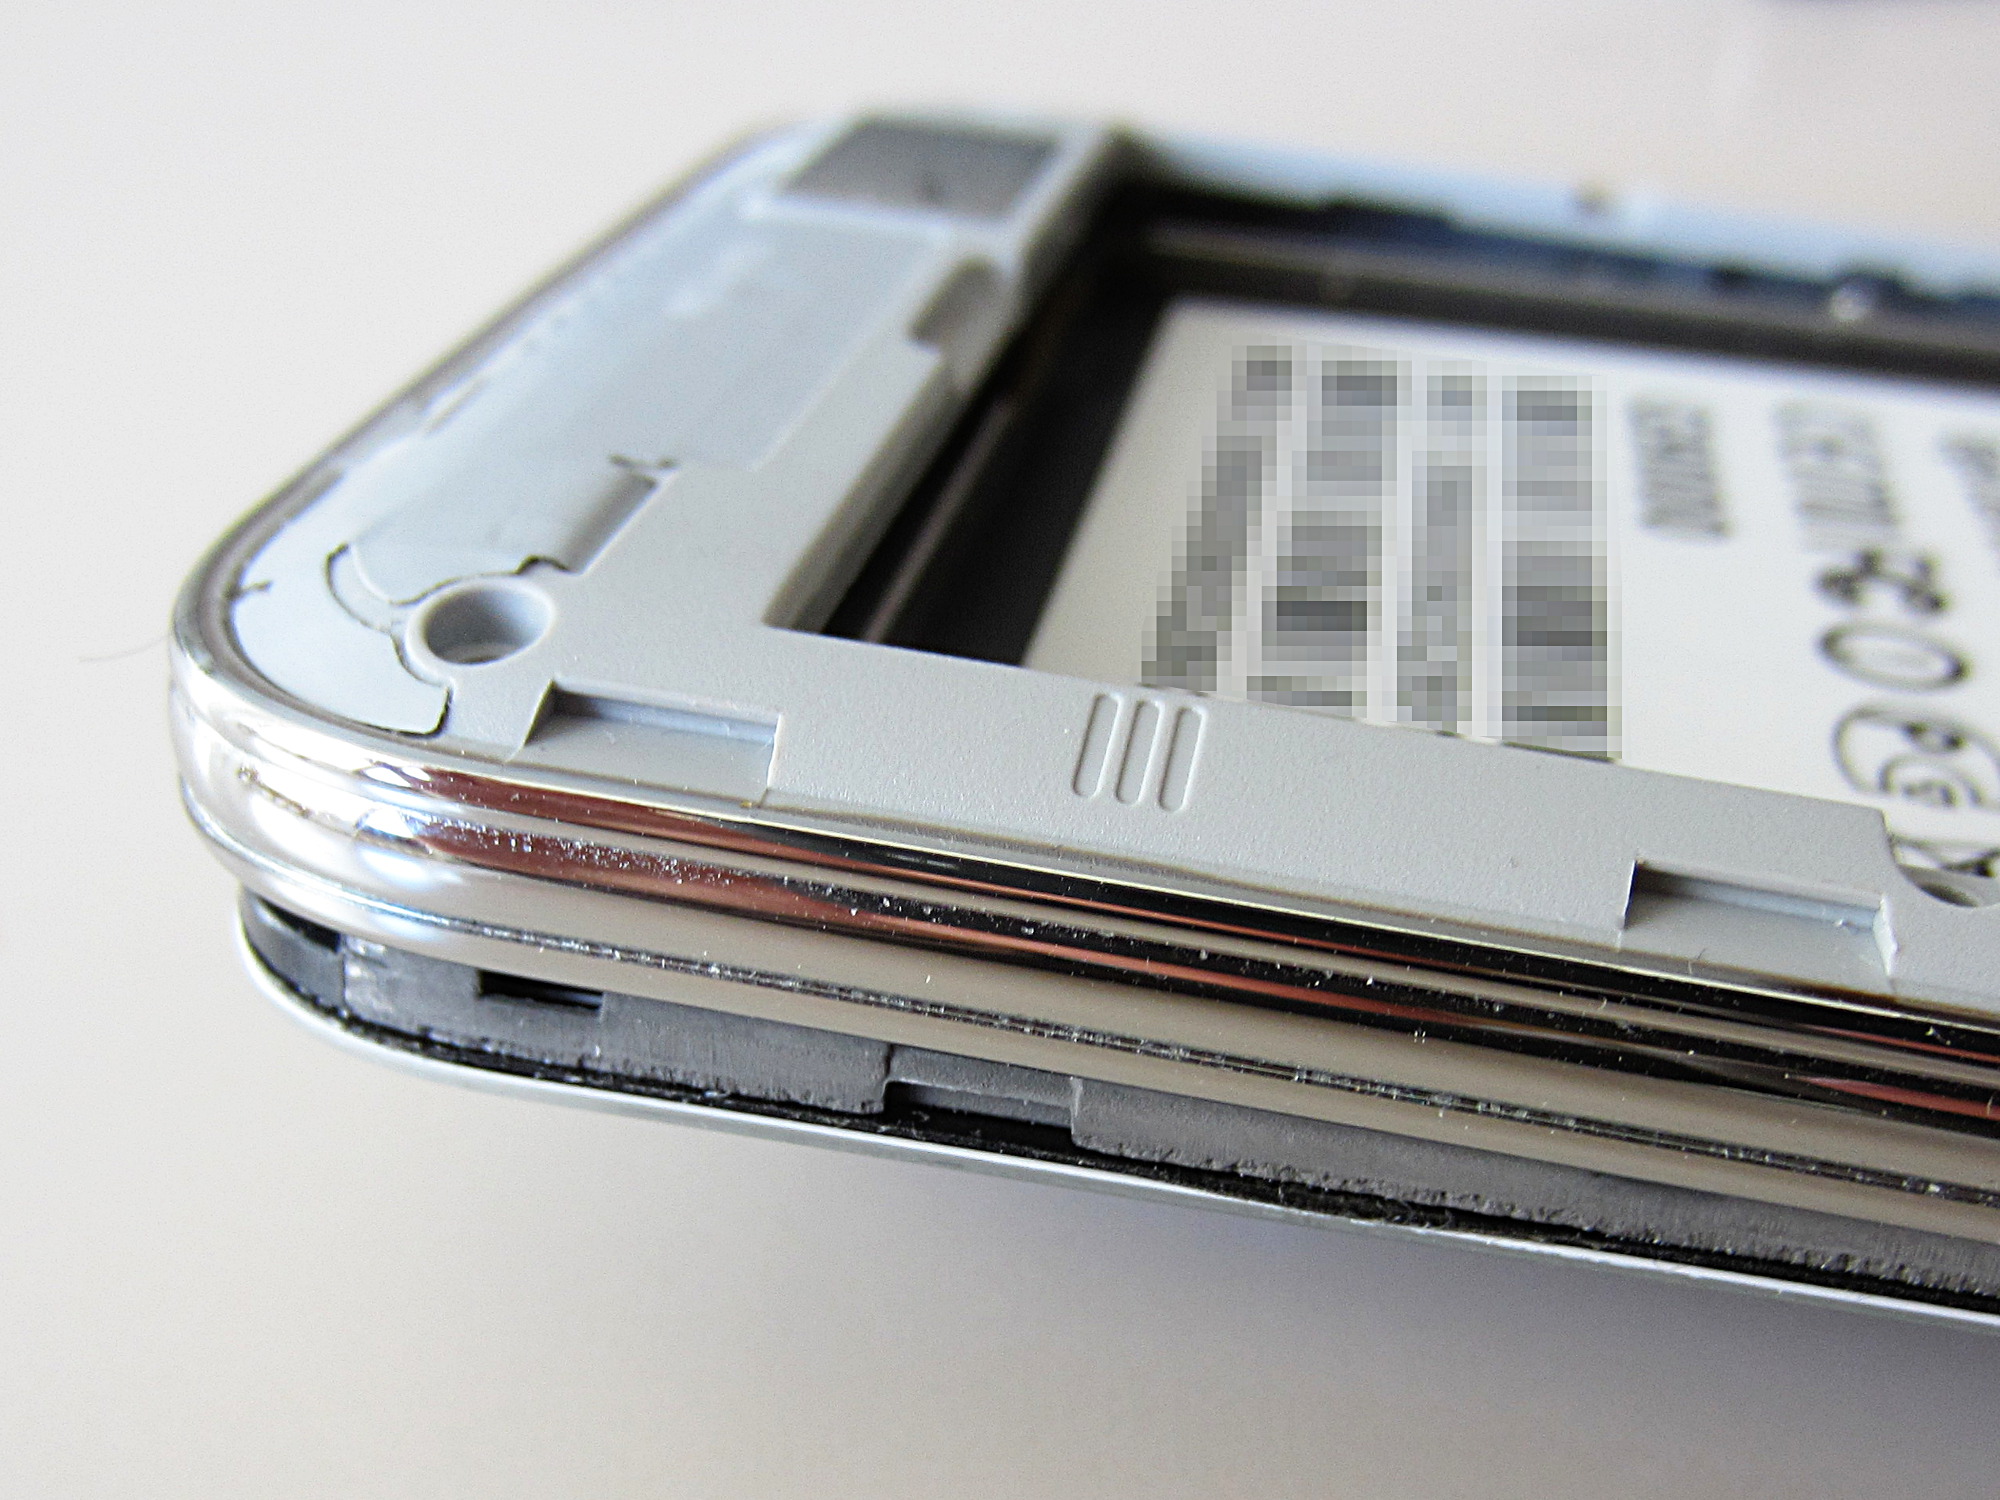
It was not a cable or connector problem, it turned out that the power connector required a soldering reflow. Fortunately only a partial disassemble of the phone was required: just removing the back frame you can detach the power board.
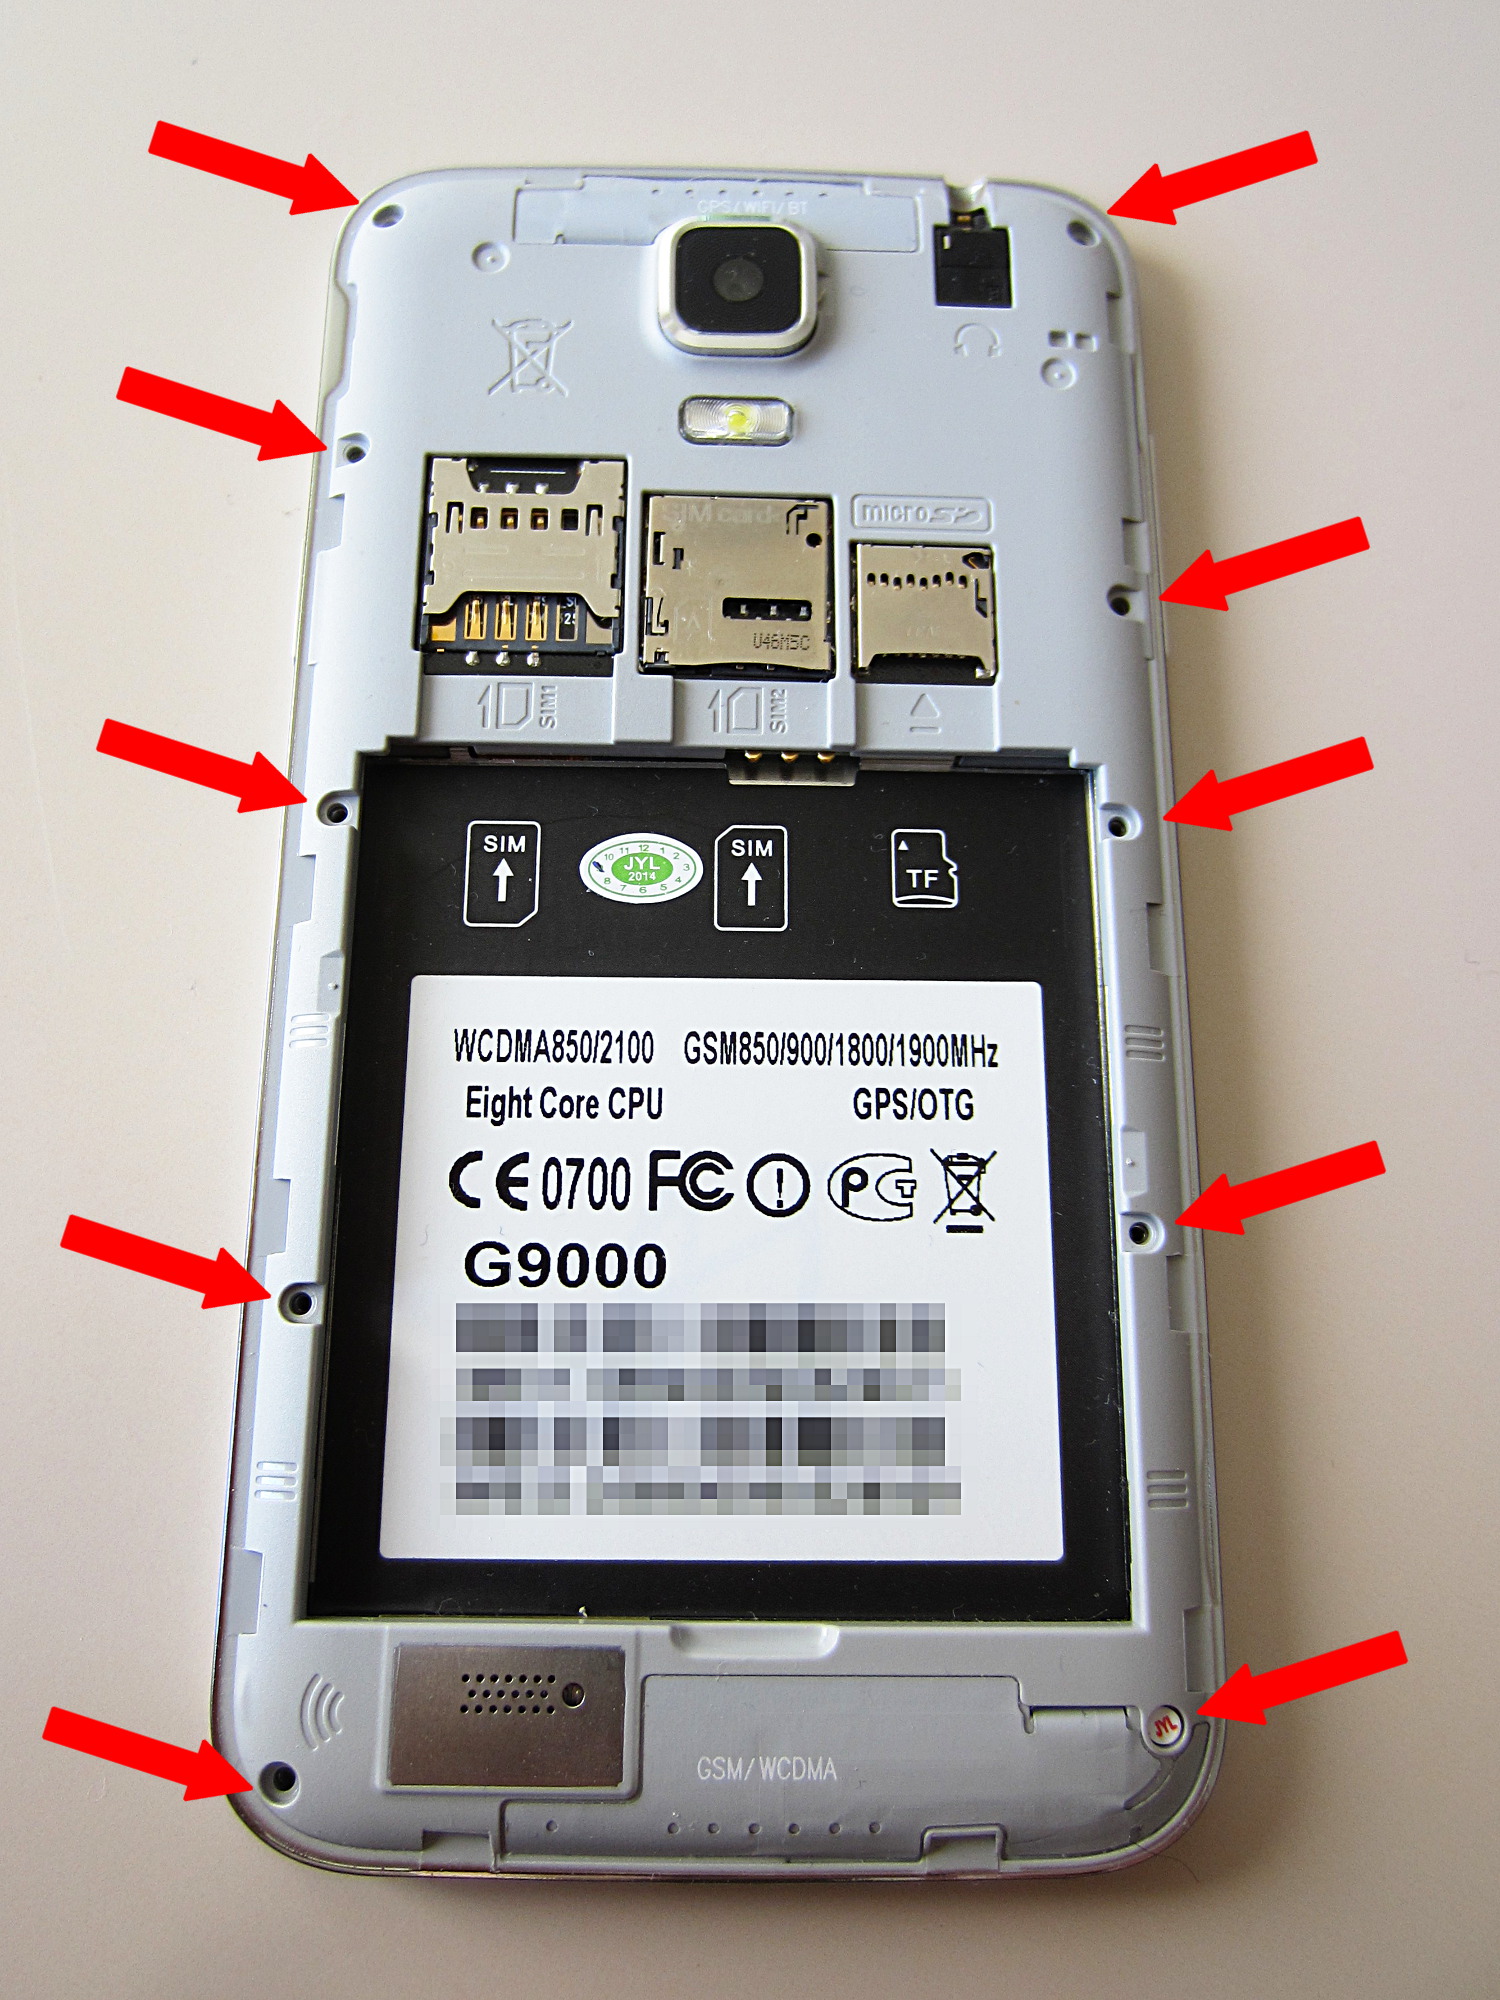
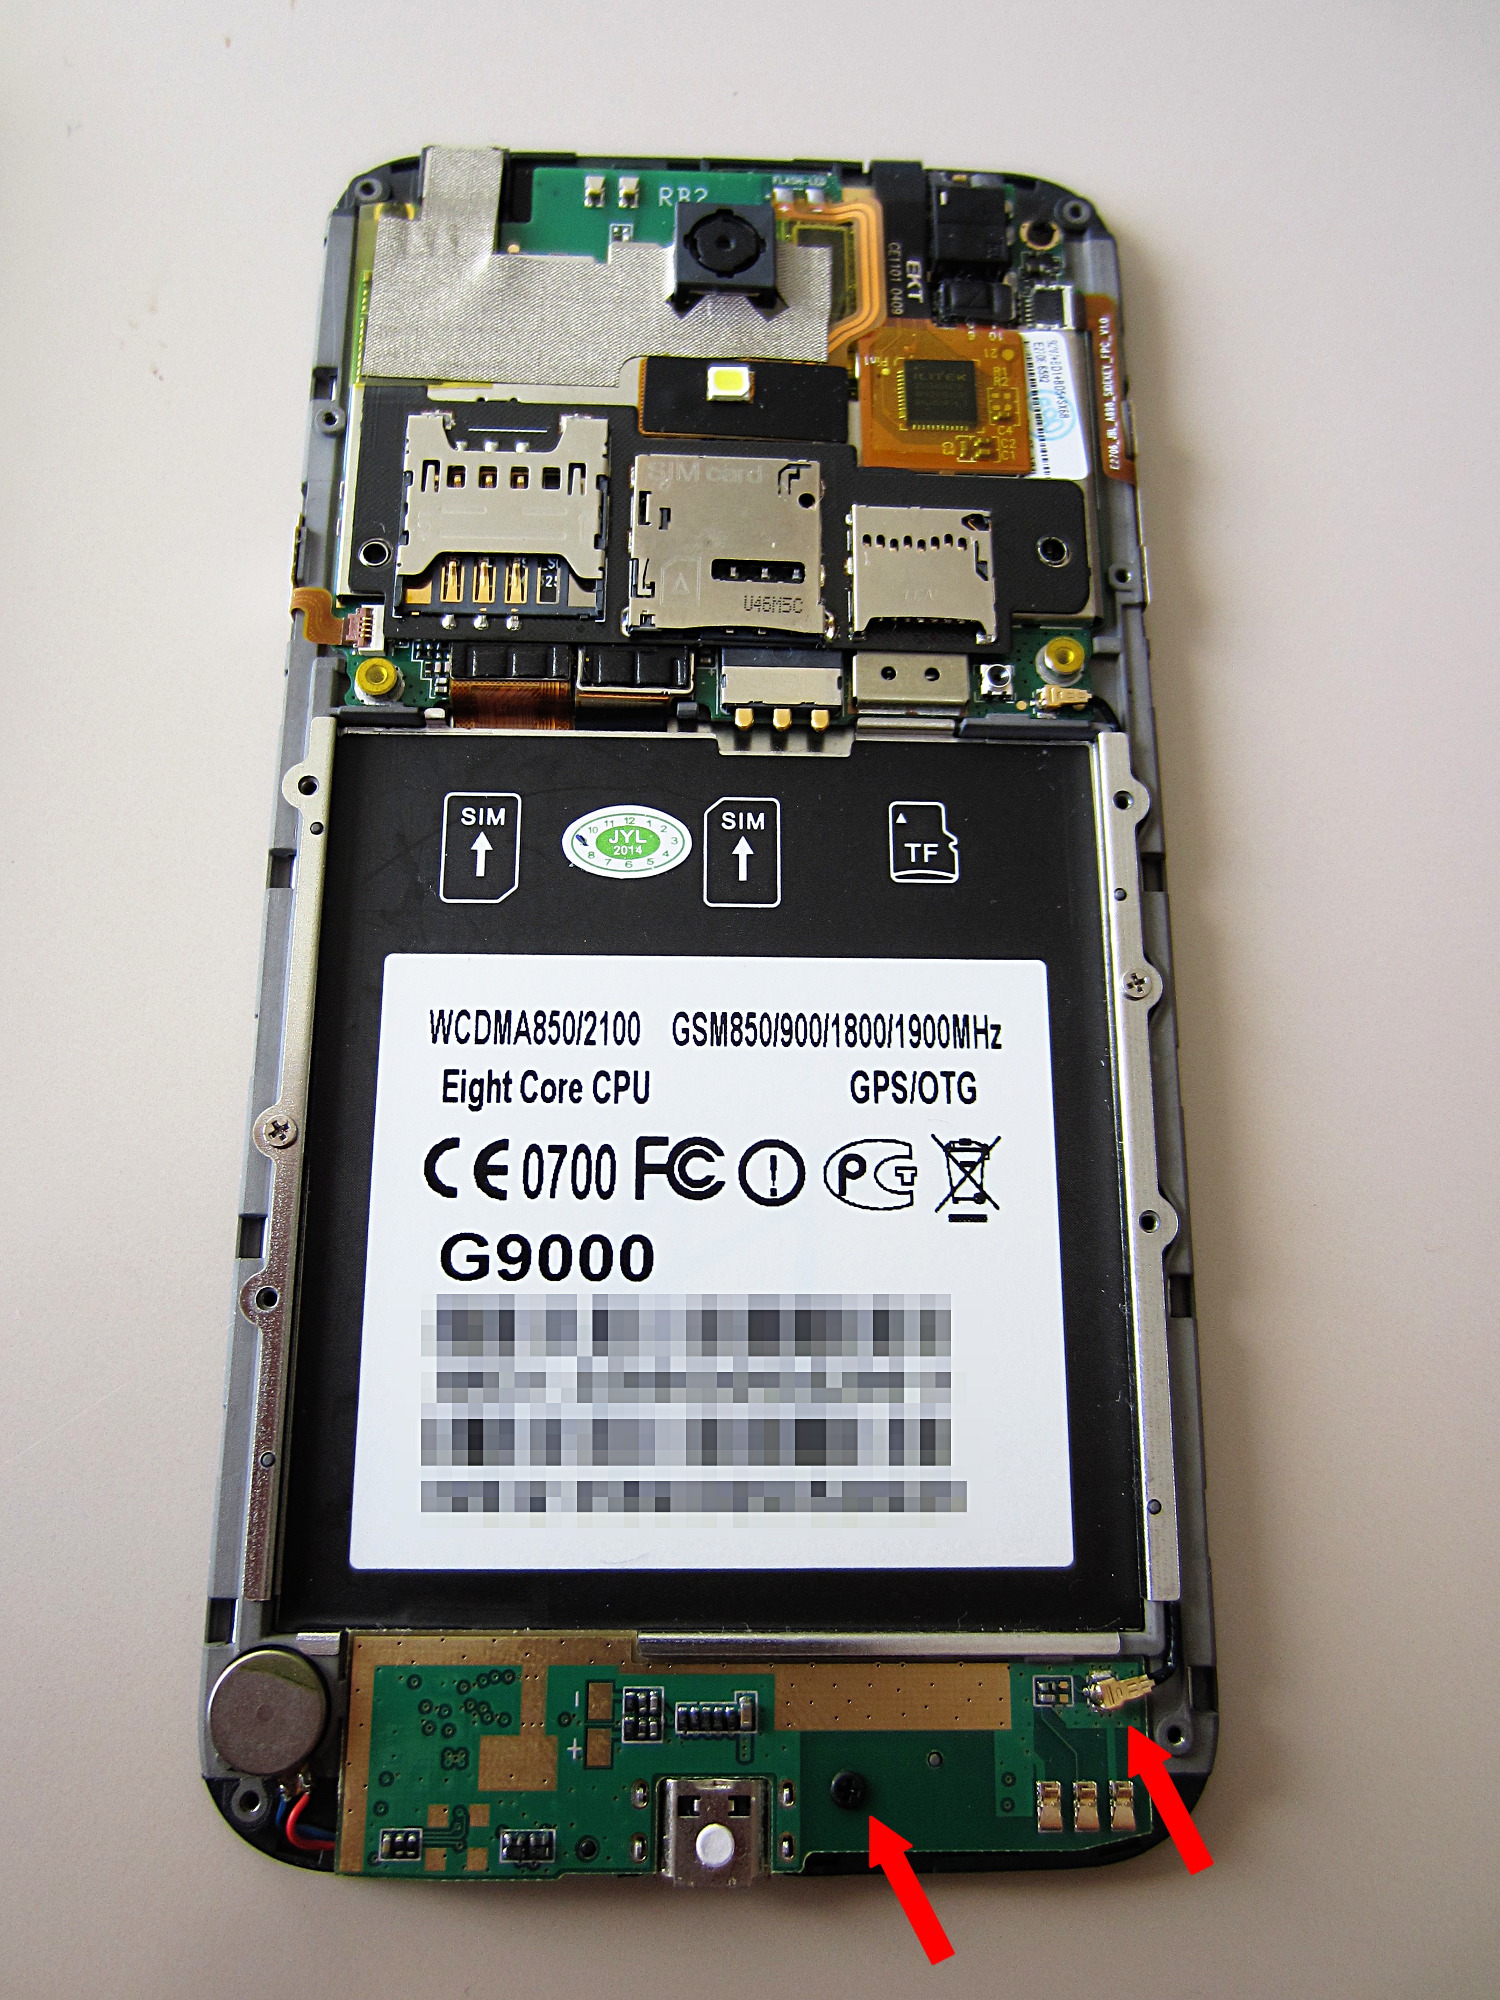
Remove the 10 screws which keep the back frame. Divaricate the metal-plated frame from the screen glass using your thumb's nails. Facing the screen: the glass comes toward you and the frames goes to the back. Beware of the volume and power buttons.
The power board at the bottom is secured with a single screw. Before removing it, detach the antenna cable and pull the vibrator out from its seat, where is secured with some adhesive.
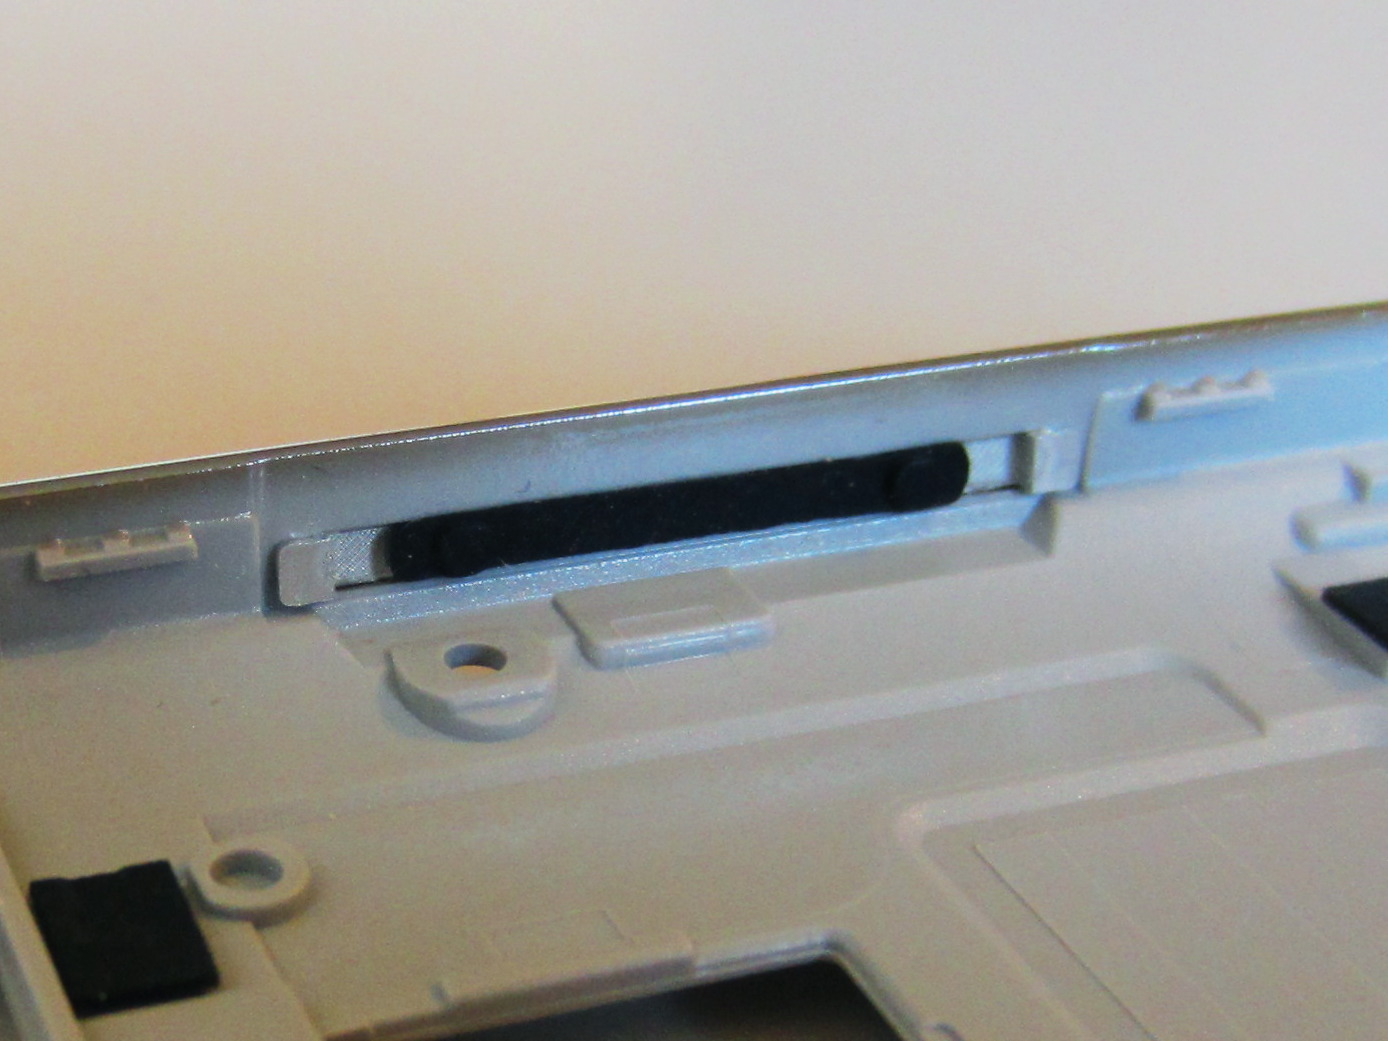
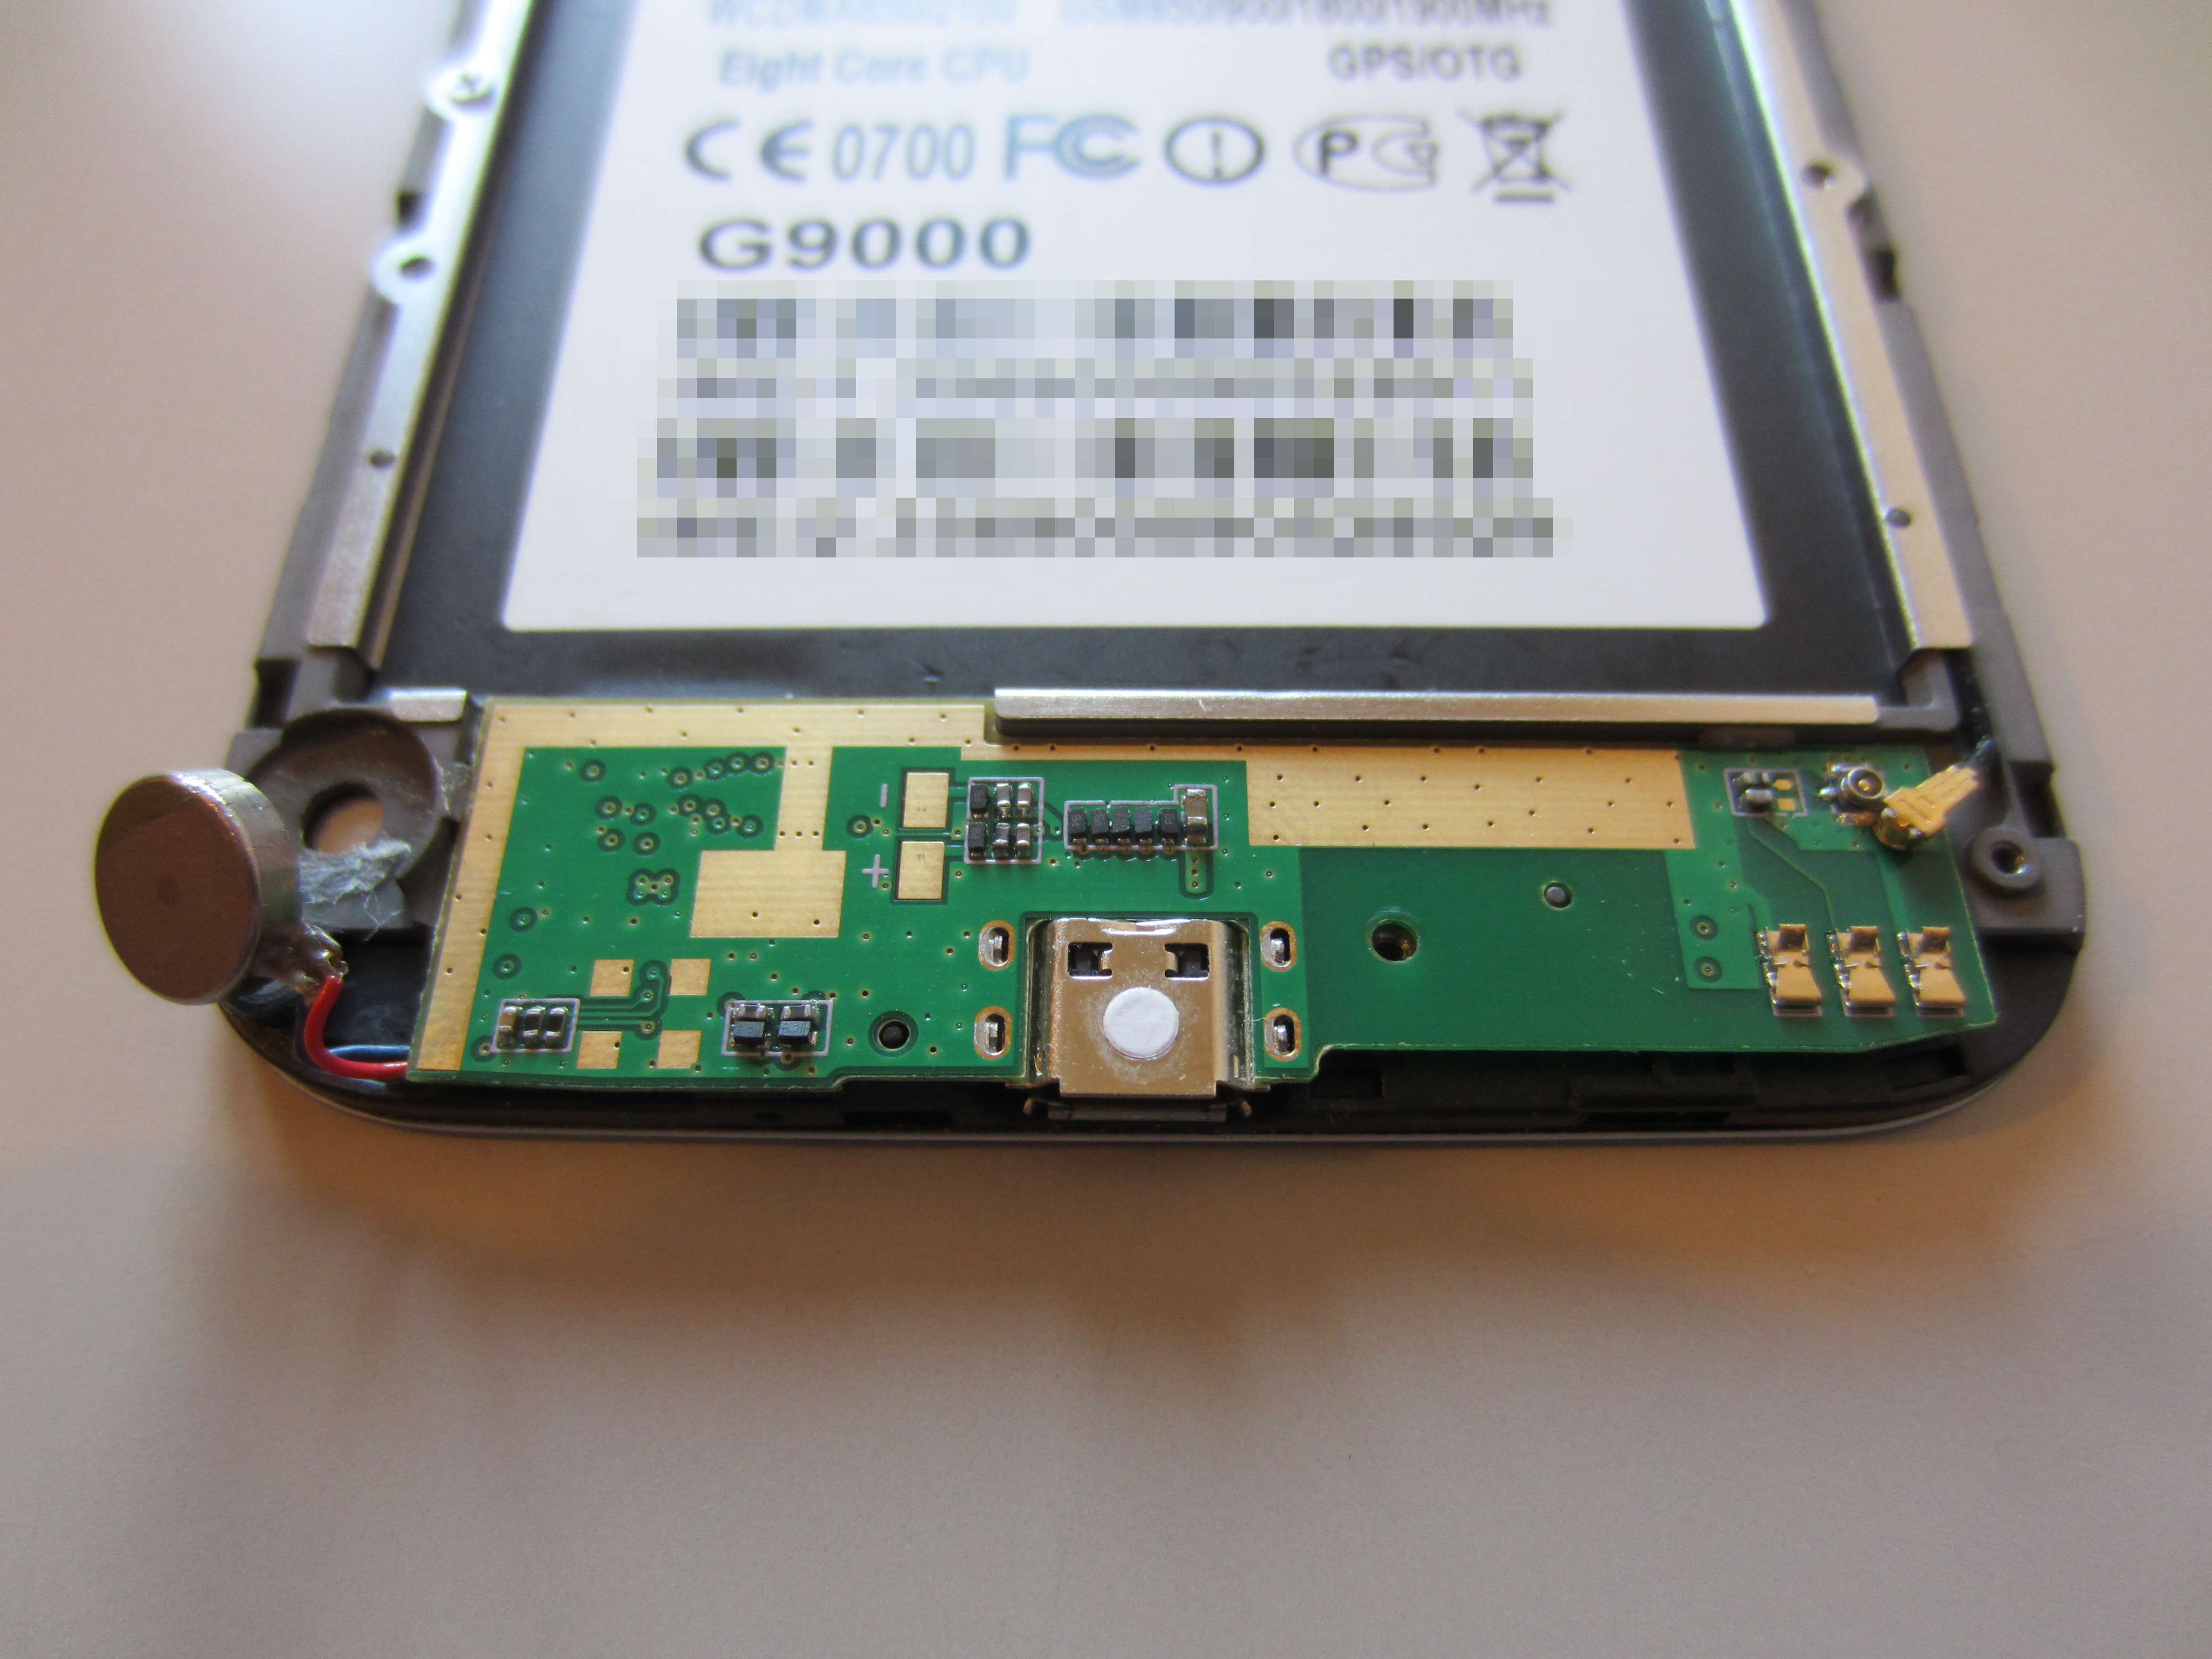
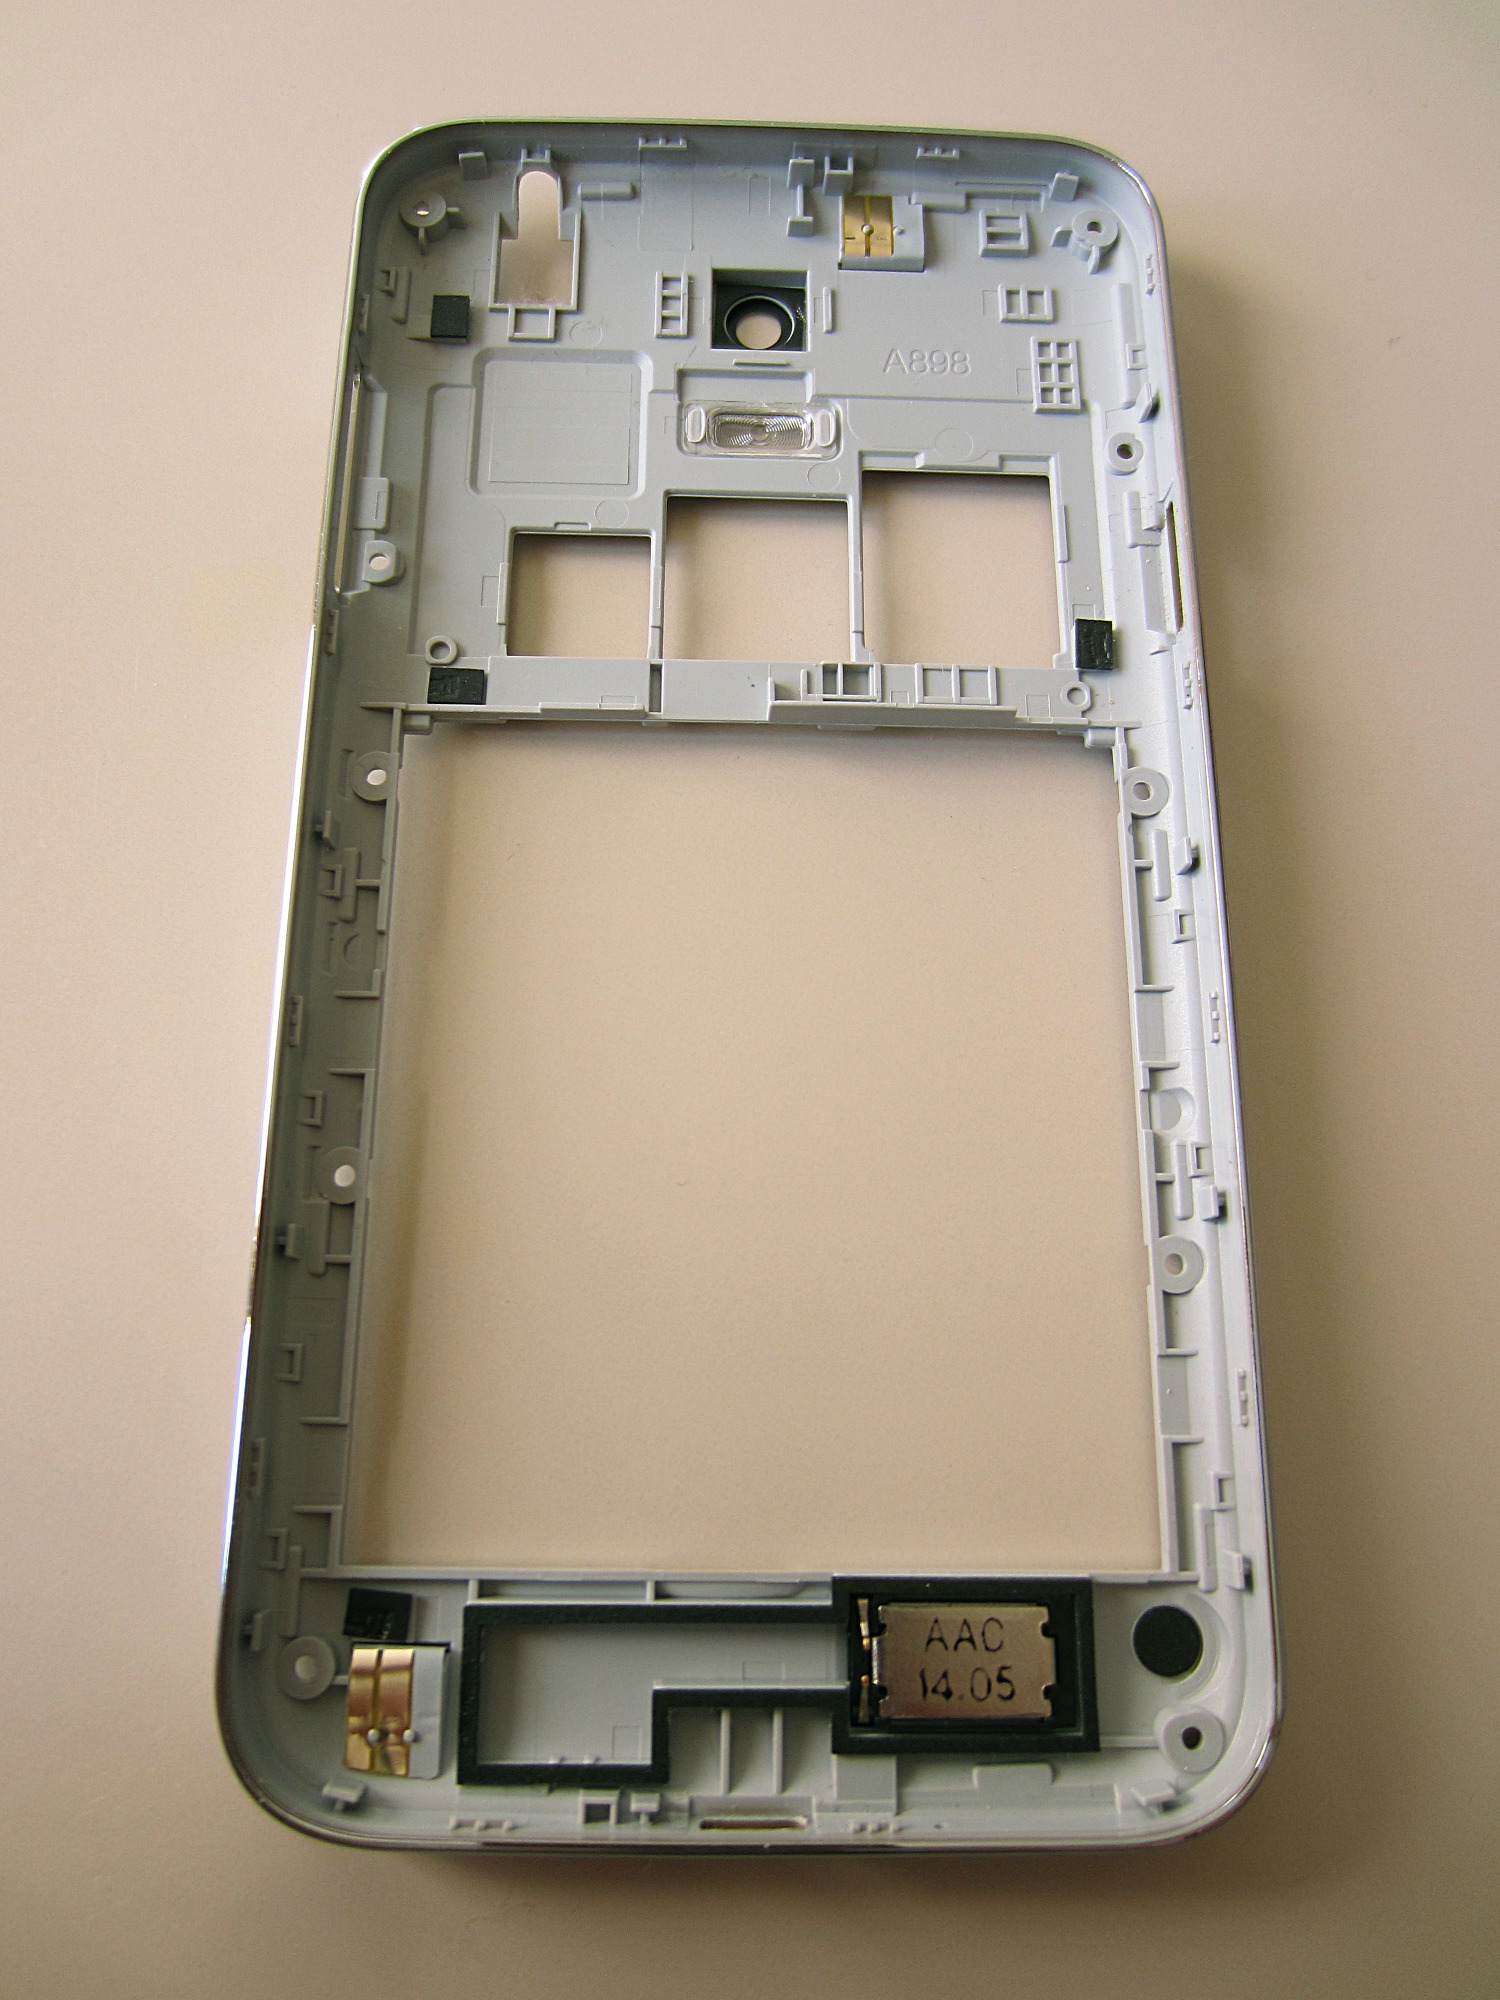
Now you can rotate the power board and see the flat connector. The white piece of plastic keeps the connector locked-in: flip it, so the connector is released.
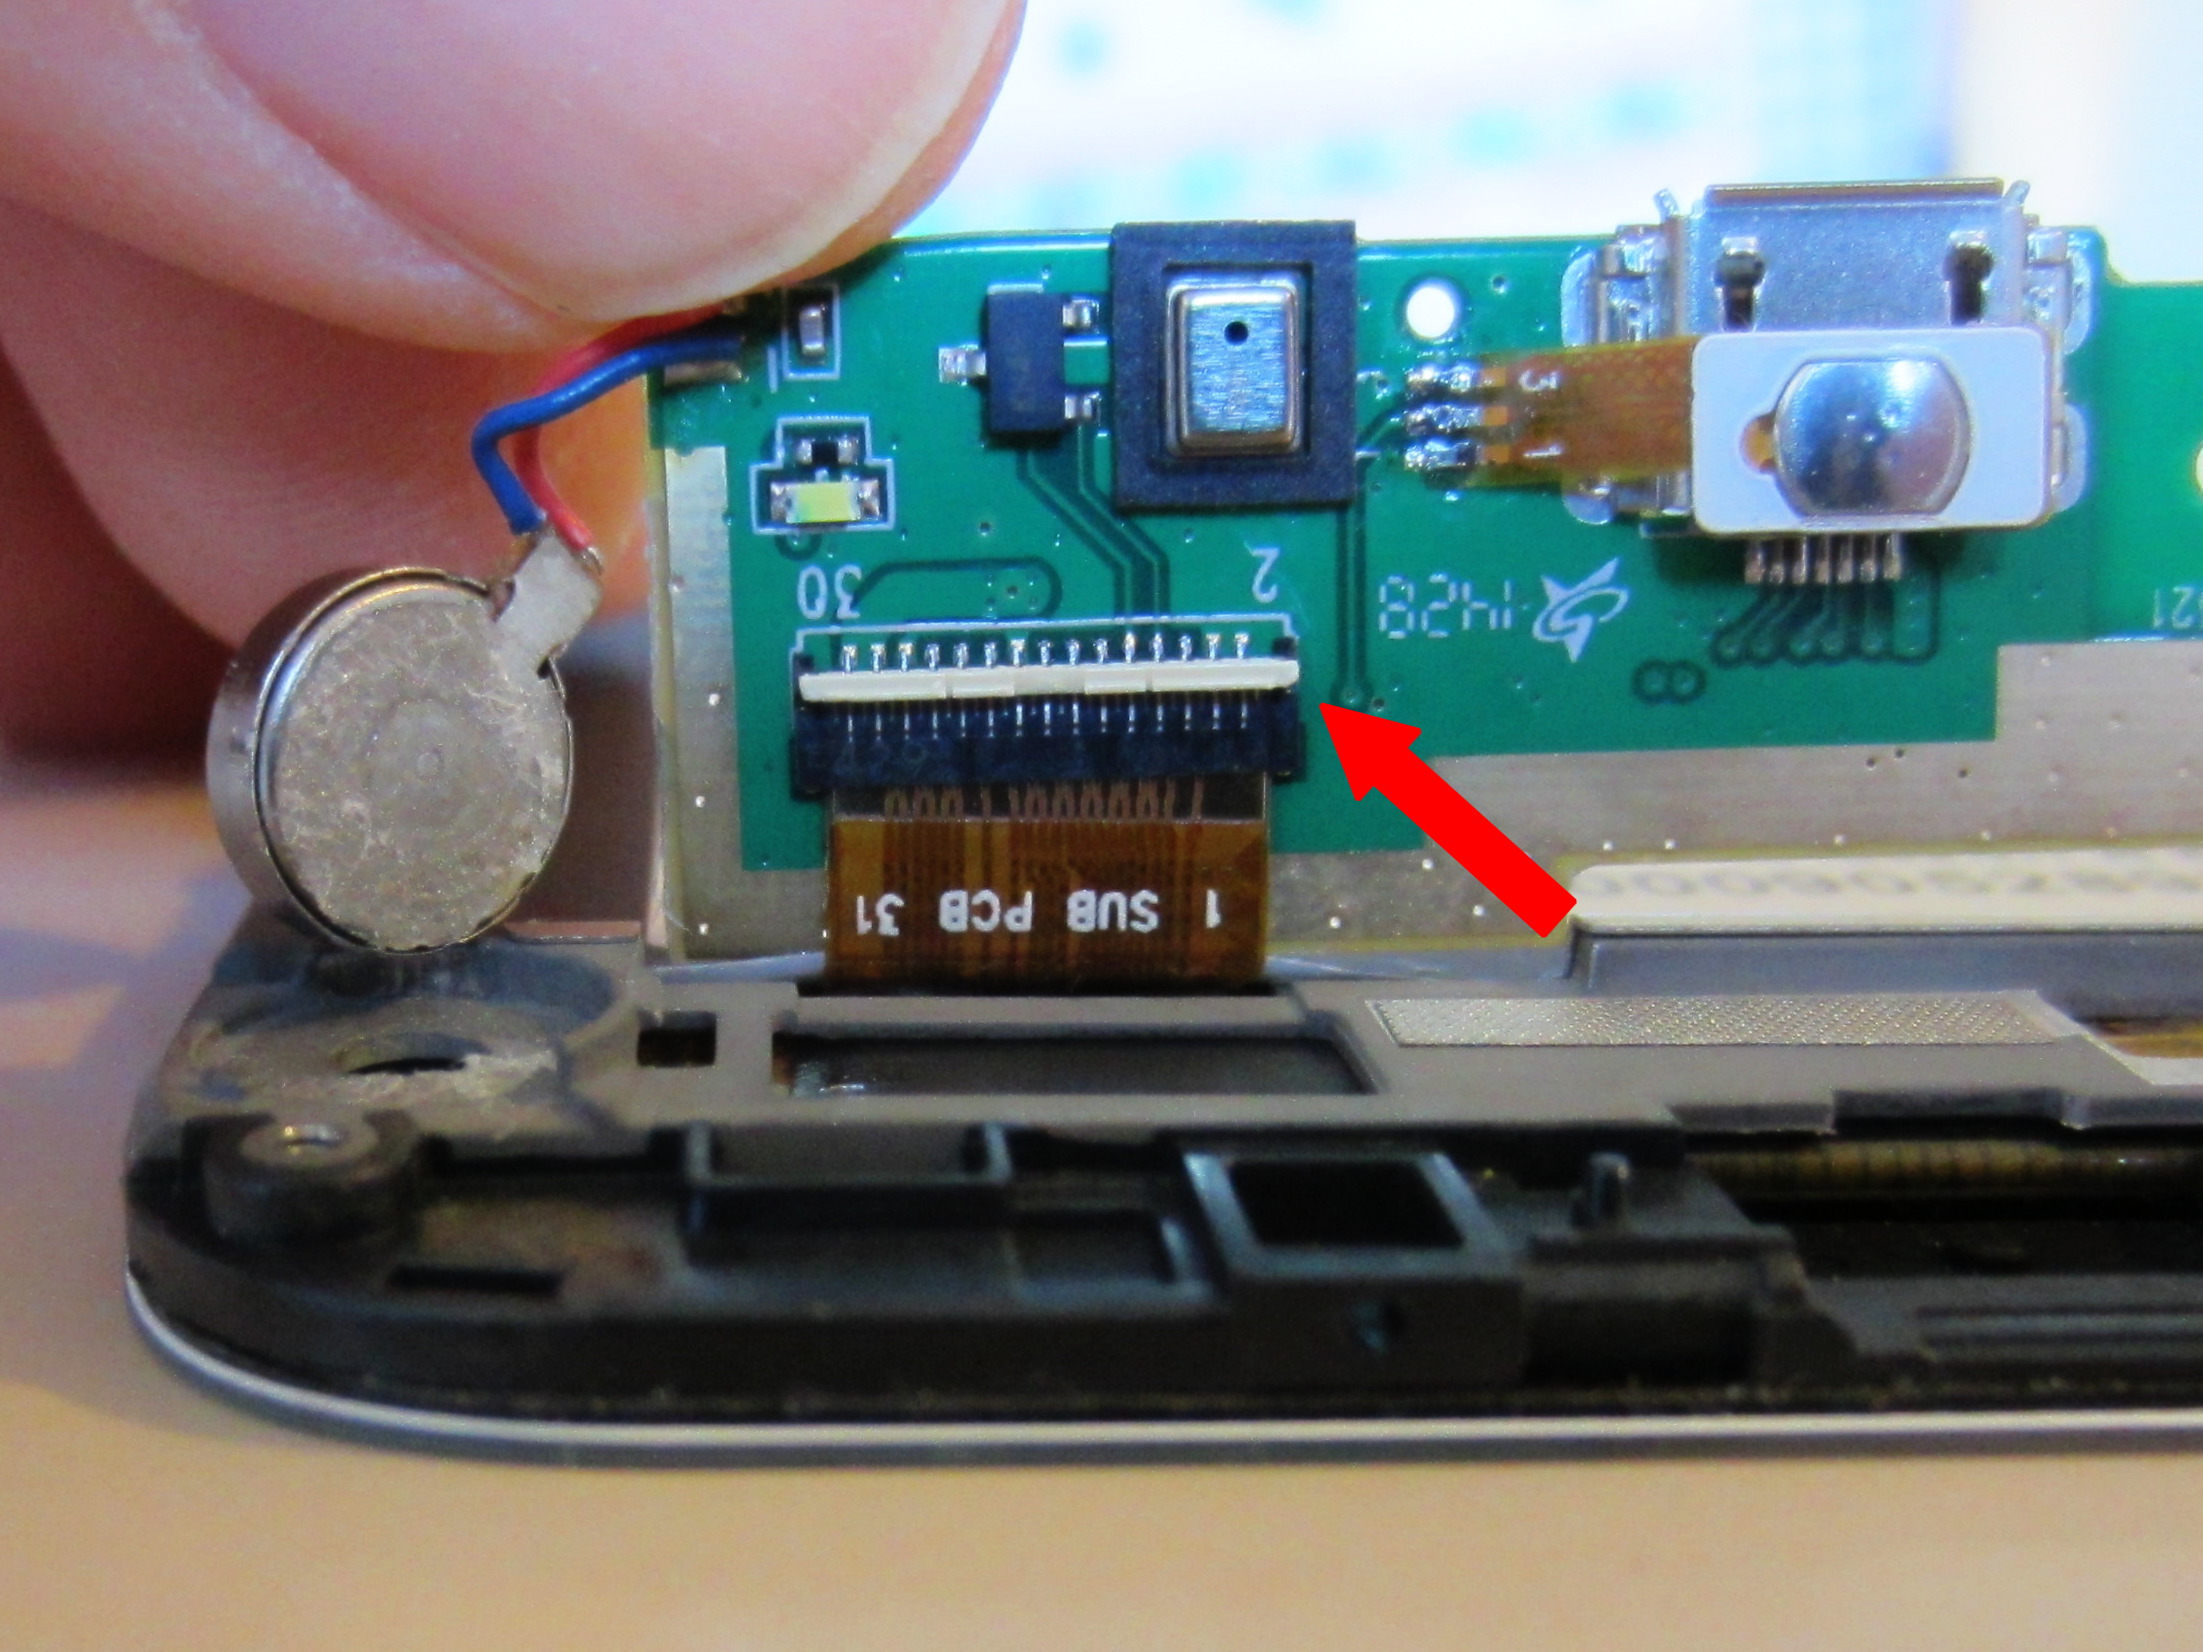
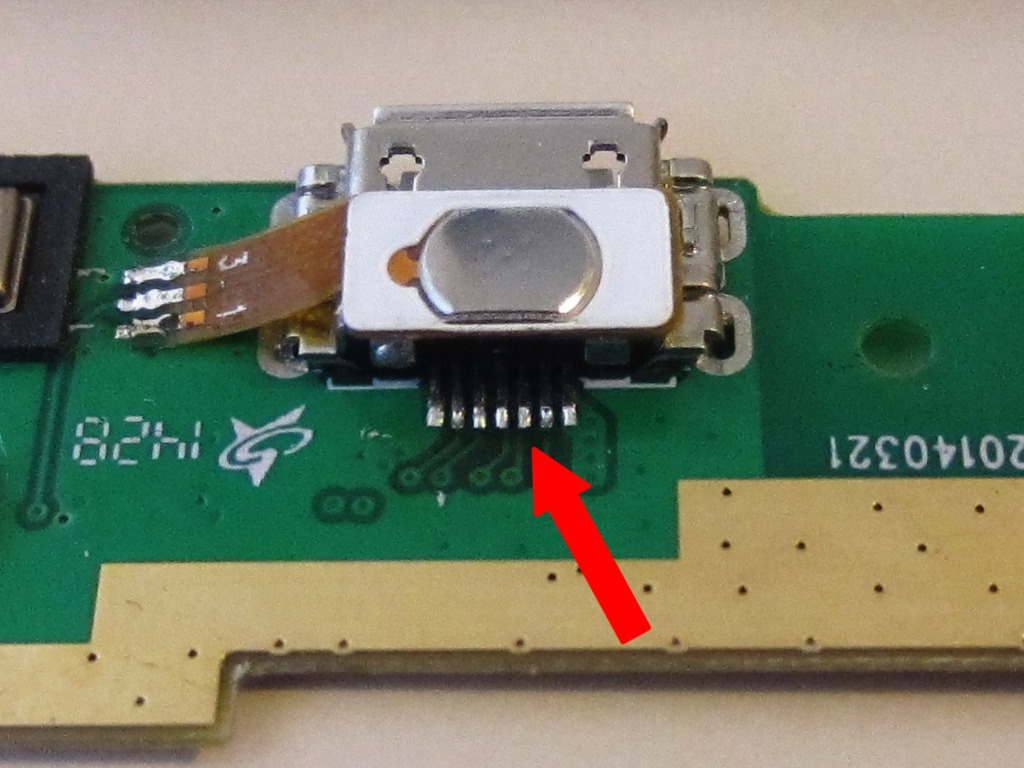
Now the power board is free and you can reflow the soldering. I put very little soldering flux over the contacts, a bit of tin (a good silver-alloy) on the soldering iron. I used a 2 mm soldering tip, larger than the contacts, so I used very few tin for a very short time. Clean the flux with a needle, cotton swab and alcohol; inspect closely to avoid short-circuits.
After some days of use, it seems that the charging problem is solved.
Link
<php>echo '<a rel=“me” href=“https://profiles.google.com/100662196154811835450”>Profilo Google+</a>' . “\n”;</php>