


In this lesson, you learn to use Notes menus and commands, SmartIcons, workspace pages, the Status bar, and views.
As do most Windows applications, Notes supplies pull-down menus that contain the commands you use to work in Notes. Each menu contains a list of commands that relate to the operation of Notes. For example, the Edit menu contains such commands as Cut, C opy, Paste, and Clear. In addition, some menus change depending on the task you’re performing; for example, Notes adds the Actions menu to the menu bar when you open a database.
 Pull-Down Menu
A menu that includes a list of related commands or actions. You pull the menu down by activating it with the mo use or the keyboard.
To open a menu using the mouse, click on the menu name in the menu bar. To open a menu using the keyboard, press the Alt key, and then press the underli ned letter in the menu name. (For example, to open the File menu, you can press Alt+F.) Either way, the menu drops down to display a list of related commands (see Figure 3.1).
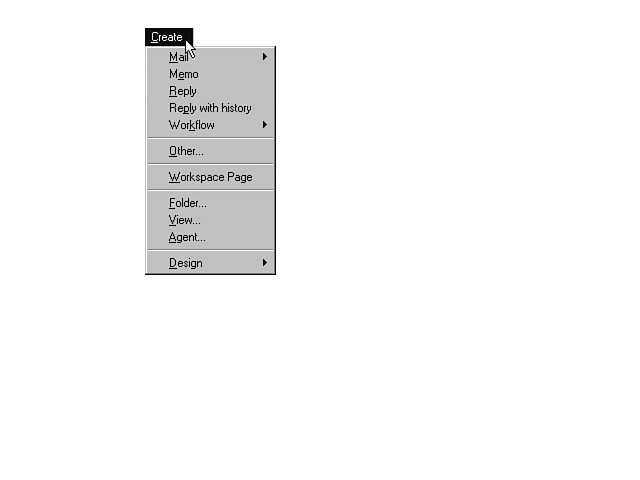
To select a command using the mouse, simply click on it. To activate a command using the keyboard, press the hot key of the command you want. If selecting a command leads to a secondary menu, click on a command in the secondary menu or press its hot key to activate it.
 Hot Key
The underlined letter in a menu name, command, or other option that you press (often in combination with the Alt key) to activate that option. Also referred to as the accelerator key.
Menus can contain a number of elements along with the commands. For example, some commands have hot keys you can use to access them from the keyboard, and some have keyboard shortcuts with which you can bypass the menu altogether. In addition, certain symbols may appear in a menu to give you an indication as to what will happen when you activate the command. Table 3.1 describes the command indicators you may see in a menu.
 Cancel a Menu
To cancel a menu, point to any blank area of the workspace and click once. Alternatively, you can press the Esc key twice.
Often, selecting a menu command causes Notes to display a dialog box or InfoBox. You can use dialog boxes and InfoBoxes to set more options and make specific choices related to the menu command. Each type of box contains certain elements you need to un derstand in order to use it.
Dialog Boxes
Figure 3.2 shows the Open Database dialog box. It contains most of the elements common to Notes dialog boxes. Table 3.2 describes those elements and tells you how to use t hem.
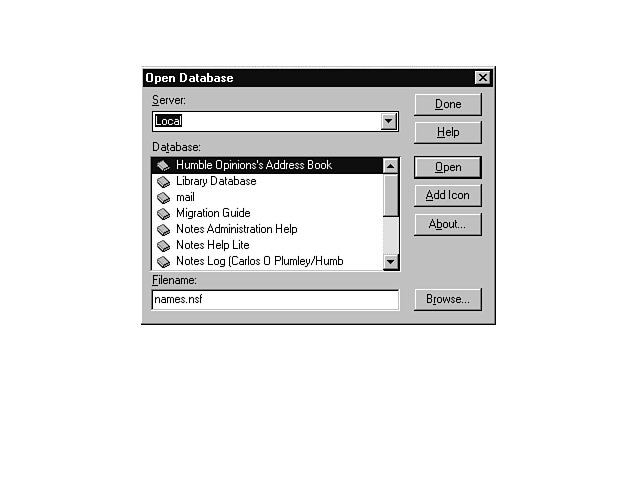
To use a dialog box, you make your selections as described in Table 3.2, and then choose a command button. The following list describes the functions of the most common command buttons:
 I Can’t Get Rid of the Dialog Box
Once you’ve opened a dialog box, you must cancel or accept the changes you’ve made and close that dialog box before you can con tinue with your work in Notes. Use the command buttons or the Close (X) button in Windows 95 to close the dialog box.
InfoBoxes
An InfoBox also presents options related to the menu command. However, you work with an InfoBox in a different way than you do a dialog box. An InfoBox displays only the properties of a specific ite m, such as a workspace or a database. Properties are types of information about an item such as its name, location, settings, design, size, and so on. When you make a selection in an InfoBox, it takes effect immediately—even though the InfoBox remain s on-screen as you work.
InfoBoxes contain tabs that offer various types of options about the subject. Figure 3.3 shows the Properties for Database InfoBox.
 Tabs
TabsA tab in an InfoBox is similar to a tab in a drawer full of file folders. Select a tab to see information related to the tab’s title.
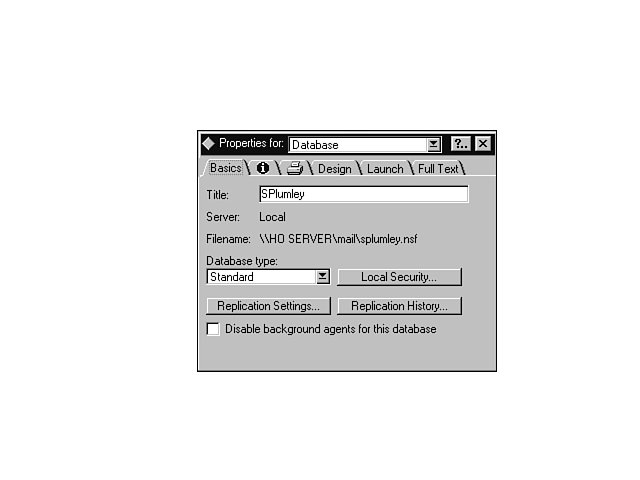
InfoBoxes have many of the same elements that dialog boxes have: drop-down lists, list boxes, text boxes, and check boxes, for example. However, InfoBoxes also contain the additional elements described in Table 3.3.
A Properties for InfoBox remains on-screen until you close it by clicking its Close (X) button. However, changes you make in the box take effect immediately; you don’t have to okay them. If an open InfoBox is in your way, you can move it around on the screen by clicking on the title bar and dragging it to a new position.
 Collapse and Expand
Double-click an InfoBox’s title bar to collapse it. Collapsing hides all but the title bar and the tabs and frees up space on the workspace. Double-click the title bar again t o expand the InfoBox back to its original view and size.
As do other Lotus applications, Lotus Notes includes SmartIcons you can use to perform common tasks quickly. Notes supplies specific SmartIcons depending on your task and your location in the Notes program. When in Workspace view, for example, the SmartIcons offer shortcuts for saving files, editing tasks, creating mail, and so on. On the other hand, when you’re viewing an open database, the SmartIcons offer shortcuts for viewing documents and lists and for searching for specific text.
Notes includes more than 150 SmartIcons you can use as shortcuts. Notes arranges many of the icons in sets that are useful for performing specific actions, such as formatting or editing a document. To change the SmartIcon set that’s displayed, cho ose File, Tools, SmartIcons. In Show, make sure the Context Icons check box is selected (if a check mark doesn’t appear in the check box, click the option) and choose OK .
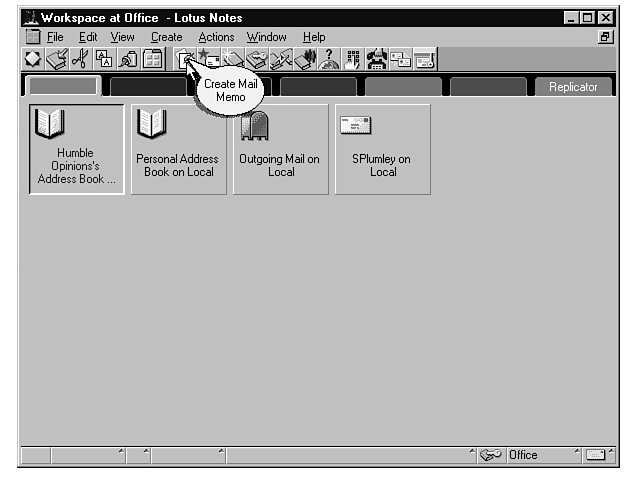
To find out what a SmartIcon represents, hold the mouse pointer over the icon, and a bubble or description appears containing the name of the menu command for which the icon is a shortcut. Figure 3.4 shows a description for the SmartIcon that represent s the Create, Mail, Memo command.
To activate a SmartIcon, simply click on it. The most common SmartIcons and the commands they represent are listed on the inside front and back covers of this book.
 Modify SmartIcons
You can customize SmartIcons by choosing File, Tools, S martIcons. For more information, see Lesson 23.
Workspace pages are similar to file folders in that each page has a tab and an area in which you can place databases. Your Notes desktop contains six workspace pages, and you use the tabs to move from one page to another. To customize your workspace, you can name the tabs and organize the pages any way you want.
 Database
A collection of information represented by an icon on the workspace. In Notes, that information might be addresses, incoming or outgo ing mail, spreadsheet documents, or word processing documents, among other things.
By default, the first page of the workspace contains items related to mail—address books and your mailbox, for example. You can move or remove these items, or you can add other items to the workspace pages.
You can right-click a blank area of the workspace to display a shortcut menu of commands related to the workspace. Choose Workspace Properties from the shortcut menu to view information about the workspace. See Lesson 10 for more information about work space pages; see Lesson 11 for more information about databases.
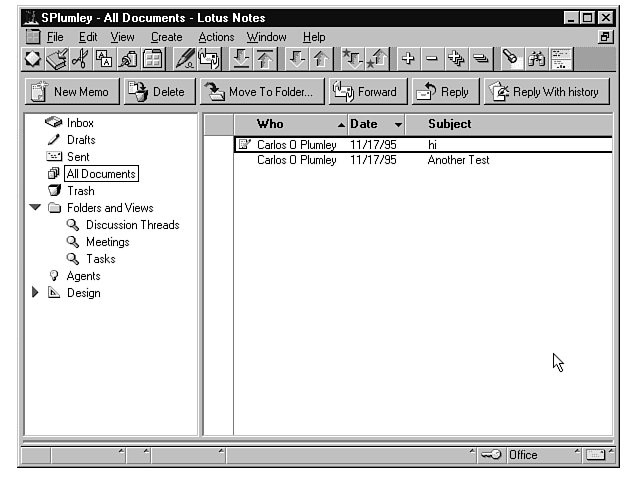
When you open any database, Notes displays the contents of the database in a list. This list is called a view. Each line in the database represents one document, person, mail message, or other item. The line gives you information about each entry, such as name, address, subject, date, or other data. No two database lists look exactly alike, and the elements displayed within the view depend upon which database you’re viewing.
 Explanation Pages
Many databases open up to display an explanation page that gives you information about the database. For more information, see Lesson 11.
Figure 3.5 shows a mailbox view. From the mailbox, you send, receive, forward, delete, read, and answer messages (see Lesson 5). After you’ve opened a database to view its contents, you can return to the workspace by choosing File, Close.
The Status bar is the bar across the bottom of the Notes window that displays messages, icons, and other information you’ll use as you work in Notes. The Status bar is divided into sections. Some of those sections displa y messages, and others lead to a popup box or popup menu. Figure 3.6 shows the Status bar with the recent messages displayed in a popup box.
 Popup Box or Menu
A list of commands or items that appears when you click on certain Status bar buttons. A popup box < I>displays such items as messages; a popup menu displays a list of selections.
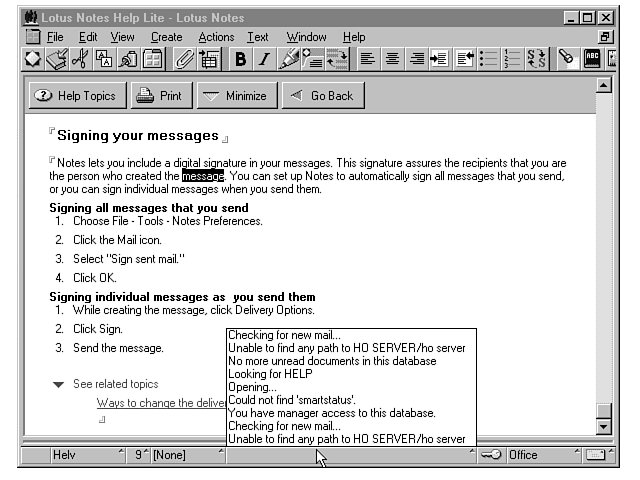
As you can see in Figure 3.6, each section of the Status bar is a button with a specific function. Table 2.4 explains the Status bar buttons and their functions.
 No Button Labels?
If your Status bar buttons do not display labels, don’t worry. Labels only appear in some of the buttons when you’re in a view that (for example) us es fonts or styles. Likewise, even if the message button does not show a label, Notes always displays a list of messages when you click it.
In this lesson, you learned to use menus and commands, dialog boxes and InfoBoxes, workspace pages, and the Status bar. In the next lesson, you’ll learn to use Notes’ Help feature.


